Review - 42131 - CAT D11 Bulldozer
Review


REVIEW - 42131 - CAT D11 BULLDOZER
INTRODUCTION
Here we are, for most likely the final Technic set review of this year. And what a set it is. Can't tell you how excited I am for this set. I probably love big yellow Technic sets as much as the next guy, but a fully remote-controlled construction vehicle always seems to have plus in my book. The 8043 - Motorized Excavator (1123 parts) is still one of my favorite sets and I remember loving the 8275 - Motorized Bulldozer (1382 parts) as well. By no means, I think that LEGO sets need to be fully remote-controlled. I love models with manual functions like the 42128 - Heavy-duty Tow Truck from earlier this year. However, there is something special about construction vehicles where all (or most) functions can be operated remotely.
Speaking of the 8275; that was the first set to incorporate Power Functions in 2007. PF had a pretty good run and it is still a formidable solution. Powered Up has been introduced in 2019 and many people are still facing the dilemma of whether Powered Up is an improvement or not. I won't go into much detail about the PF vs PU discussion, but I am looking forward to seeing what the Control+ app will add to this set. The app isn't available until the 15th of September, so there is a chance you are reading this review while I haven't completed the functions section. If that is the case, I will be adding it shortly.
Like my other reviews, this one won't be overly technical, because I simply lack the knowledge and we have a lot of members who are way better in explaining the technical details. Obviously, I will do my best to give a decent explanation of the functions. But this review will focus on my feeling as an AFOL when building the set. I will try to write as I build, to take you along the journey of building this behemoth. Since I haven't paid 450 euro for this set, it's difficult for me to tell you whether a set is worth the money, but I will try to think about whether I would buy my own copy and for which amount.
I feel like I have been talking way too much and I can't wait to open the box, so enough with the talking, let's to some building!
PICTURES
Pictures can be clicked to view hi-res versions. My Flickr album contains all the photos taken for this review.
DISCLAIMER
The CEE Team of TLG has provided this set. It's not my goal to promote this set. It's my goal to give you an honest opinion about it. Therefore, the opinion in this review is my own and is in no way linked to TLG.
SET INFORMATION
Number: 42131
Title: D11T
Theme: Technic
Released: 2021
Part Count: 3854
Box Dimensions: 58,0 cm x 47,5 x 16,5 cm
Weight: 5,1 kg
Set Price (RRP): £419.99 / $449.99 / €450.99
Price per Part: £0.109 / $0.117 / €0,117
Links: Brickset, Bricklink
THE BOX
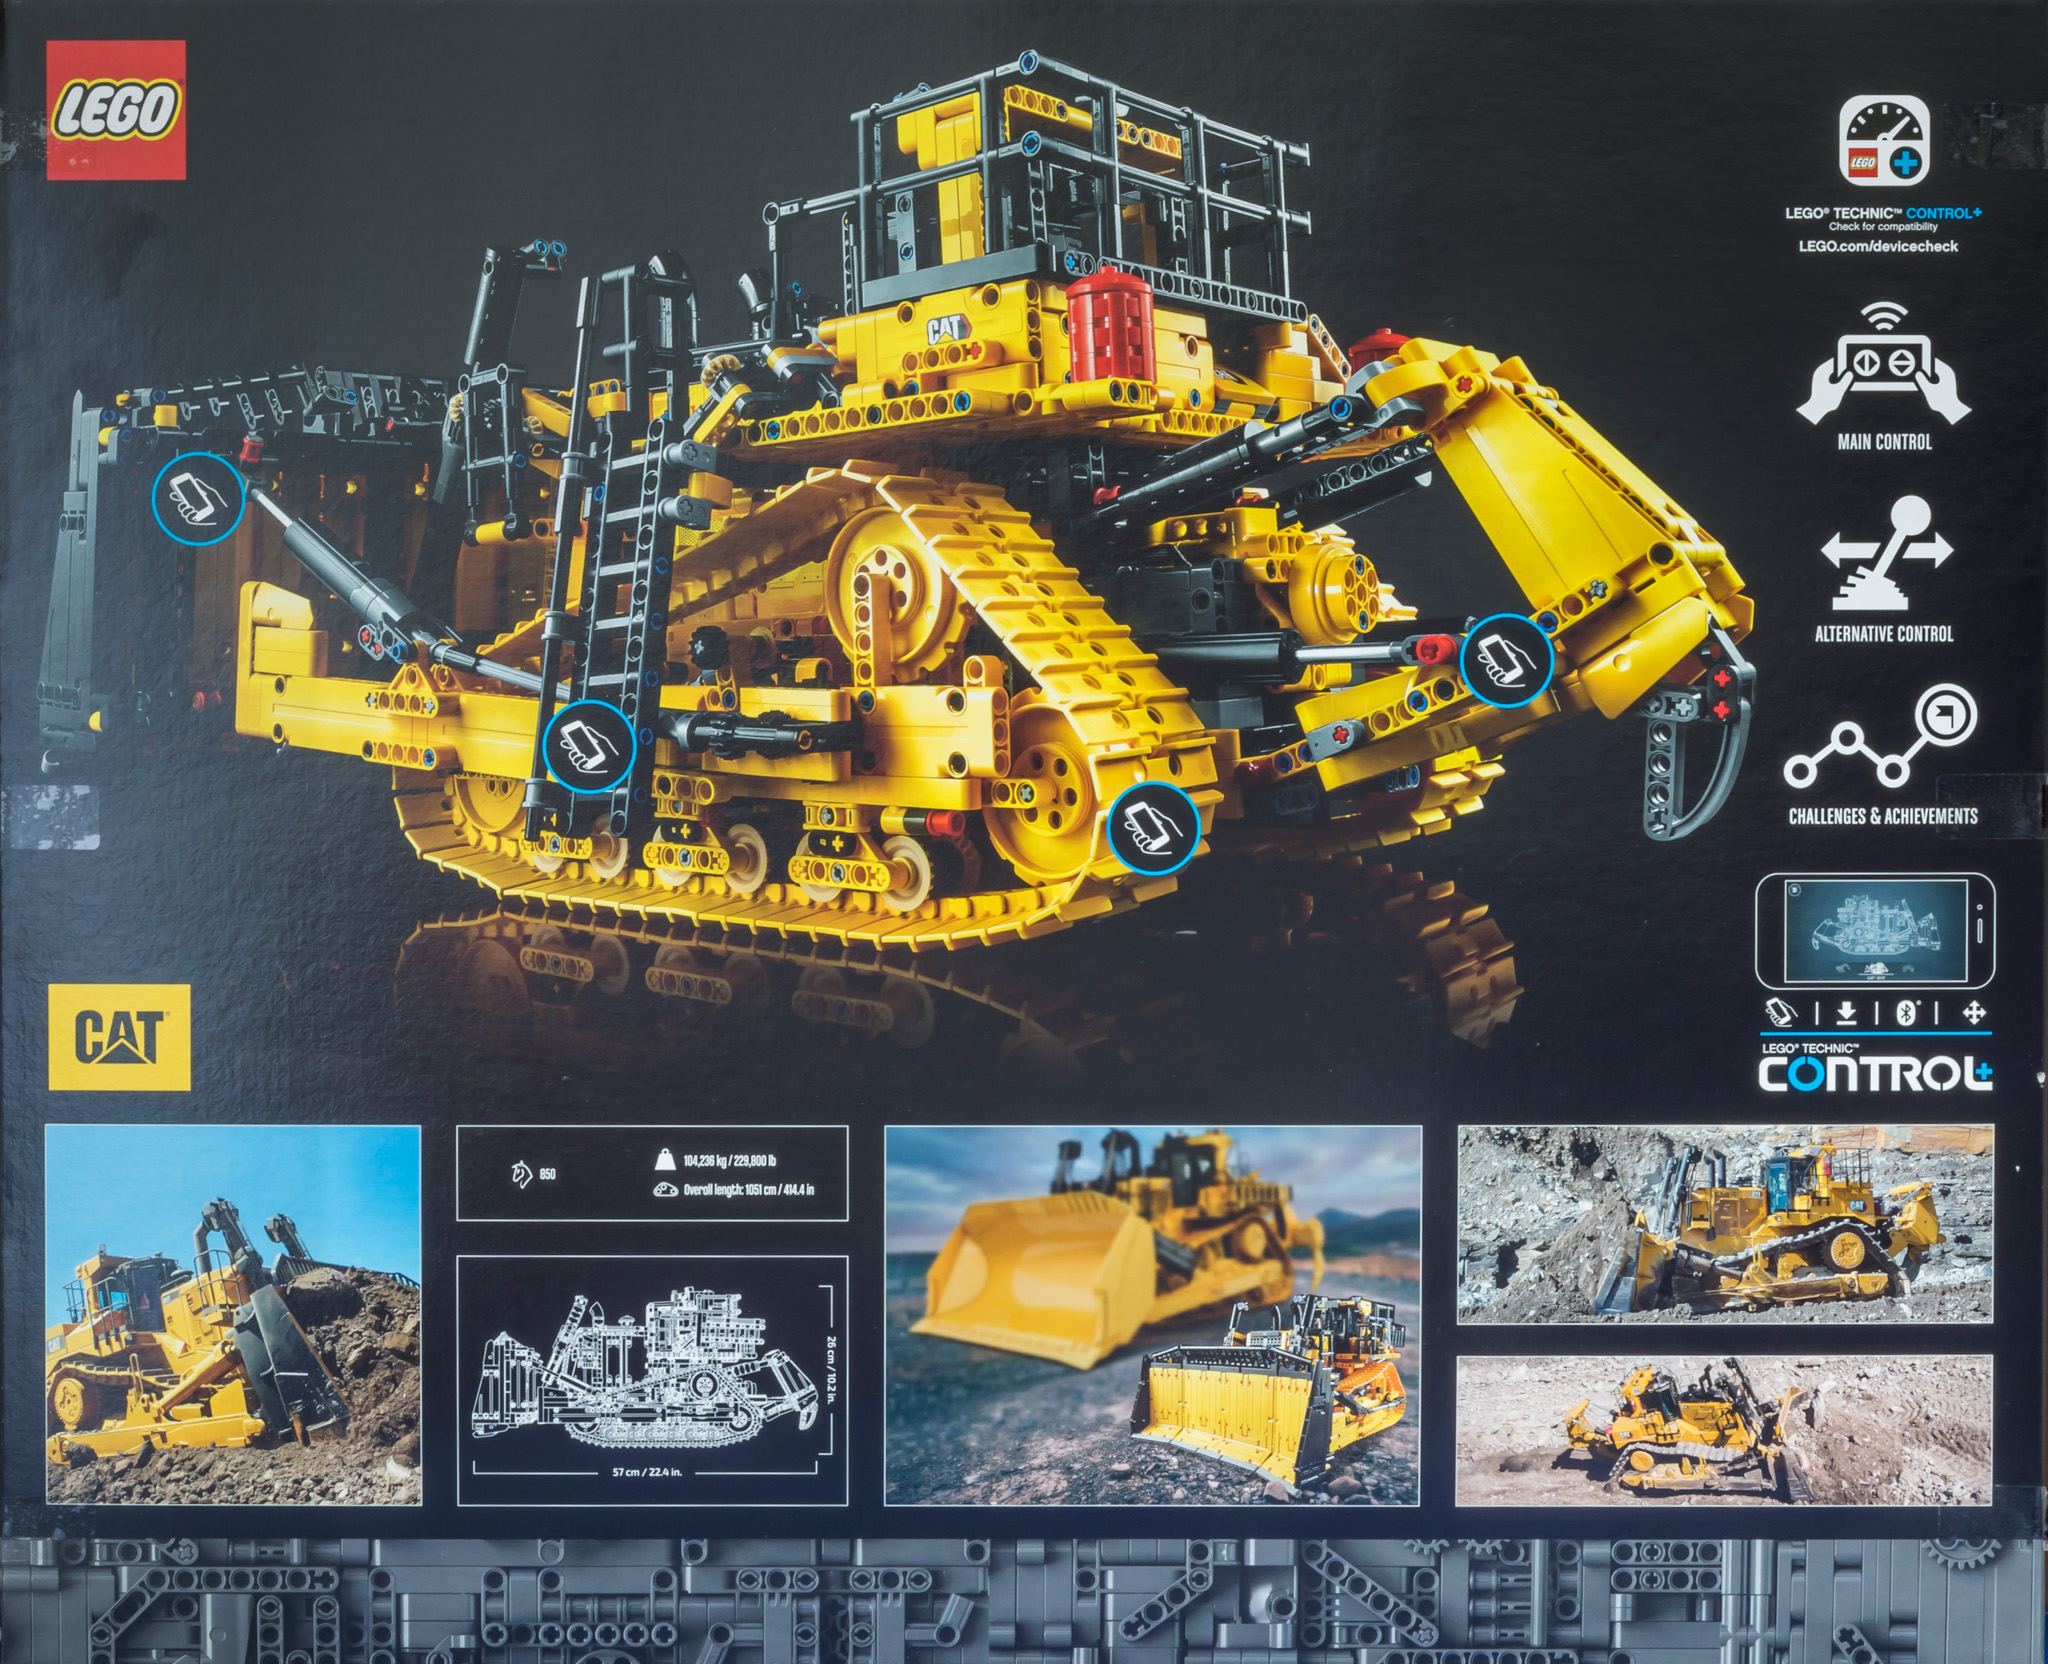
And by building I mean opening the box and start the "unboxing" process. The box itself weighs in at around 5 kg, which is an indication that the model itself will be heavy too. As we have gotten used to with 18+ set, this box also shows the model and nothing else. The angle of the image implies that TLG purposely wanted to draw attention to the massive blade. One can argue that very little of the rest of the bulldozer can be seen.

That's where the backside of the box comes in. This image shows the back of the vehicle, also from a low angle. You probably know why they shoot tall well-built persons from the bottom in films? That's the make them look even more impressive. I reckon that's an inspiration for the two main images on the box.
Interesting fact is that a prototype model was shown at the bottom left of the box. At the time of writing that version of the box image is still online on TLG's website. I'm not 100% sure, but assuming we all get the same box (with minor differences like part count showing or not) we can see that the prototype image has made way for a picture of an actual CAT D11. Showing a prototype image on the box can be confusing for customers, so I do think it's a wise decision replacing that image.
The image highlights certain points on the model with a smartphone icon. This is to indicate that those sections will be operated by the app. And yes, that's the ladder which has been highlighted. More on that later :wink:
CONTENTS OF THE BOX
The box contains:
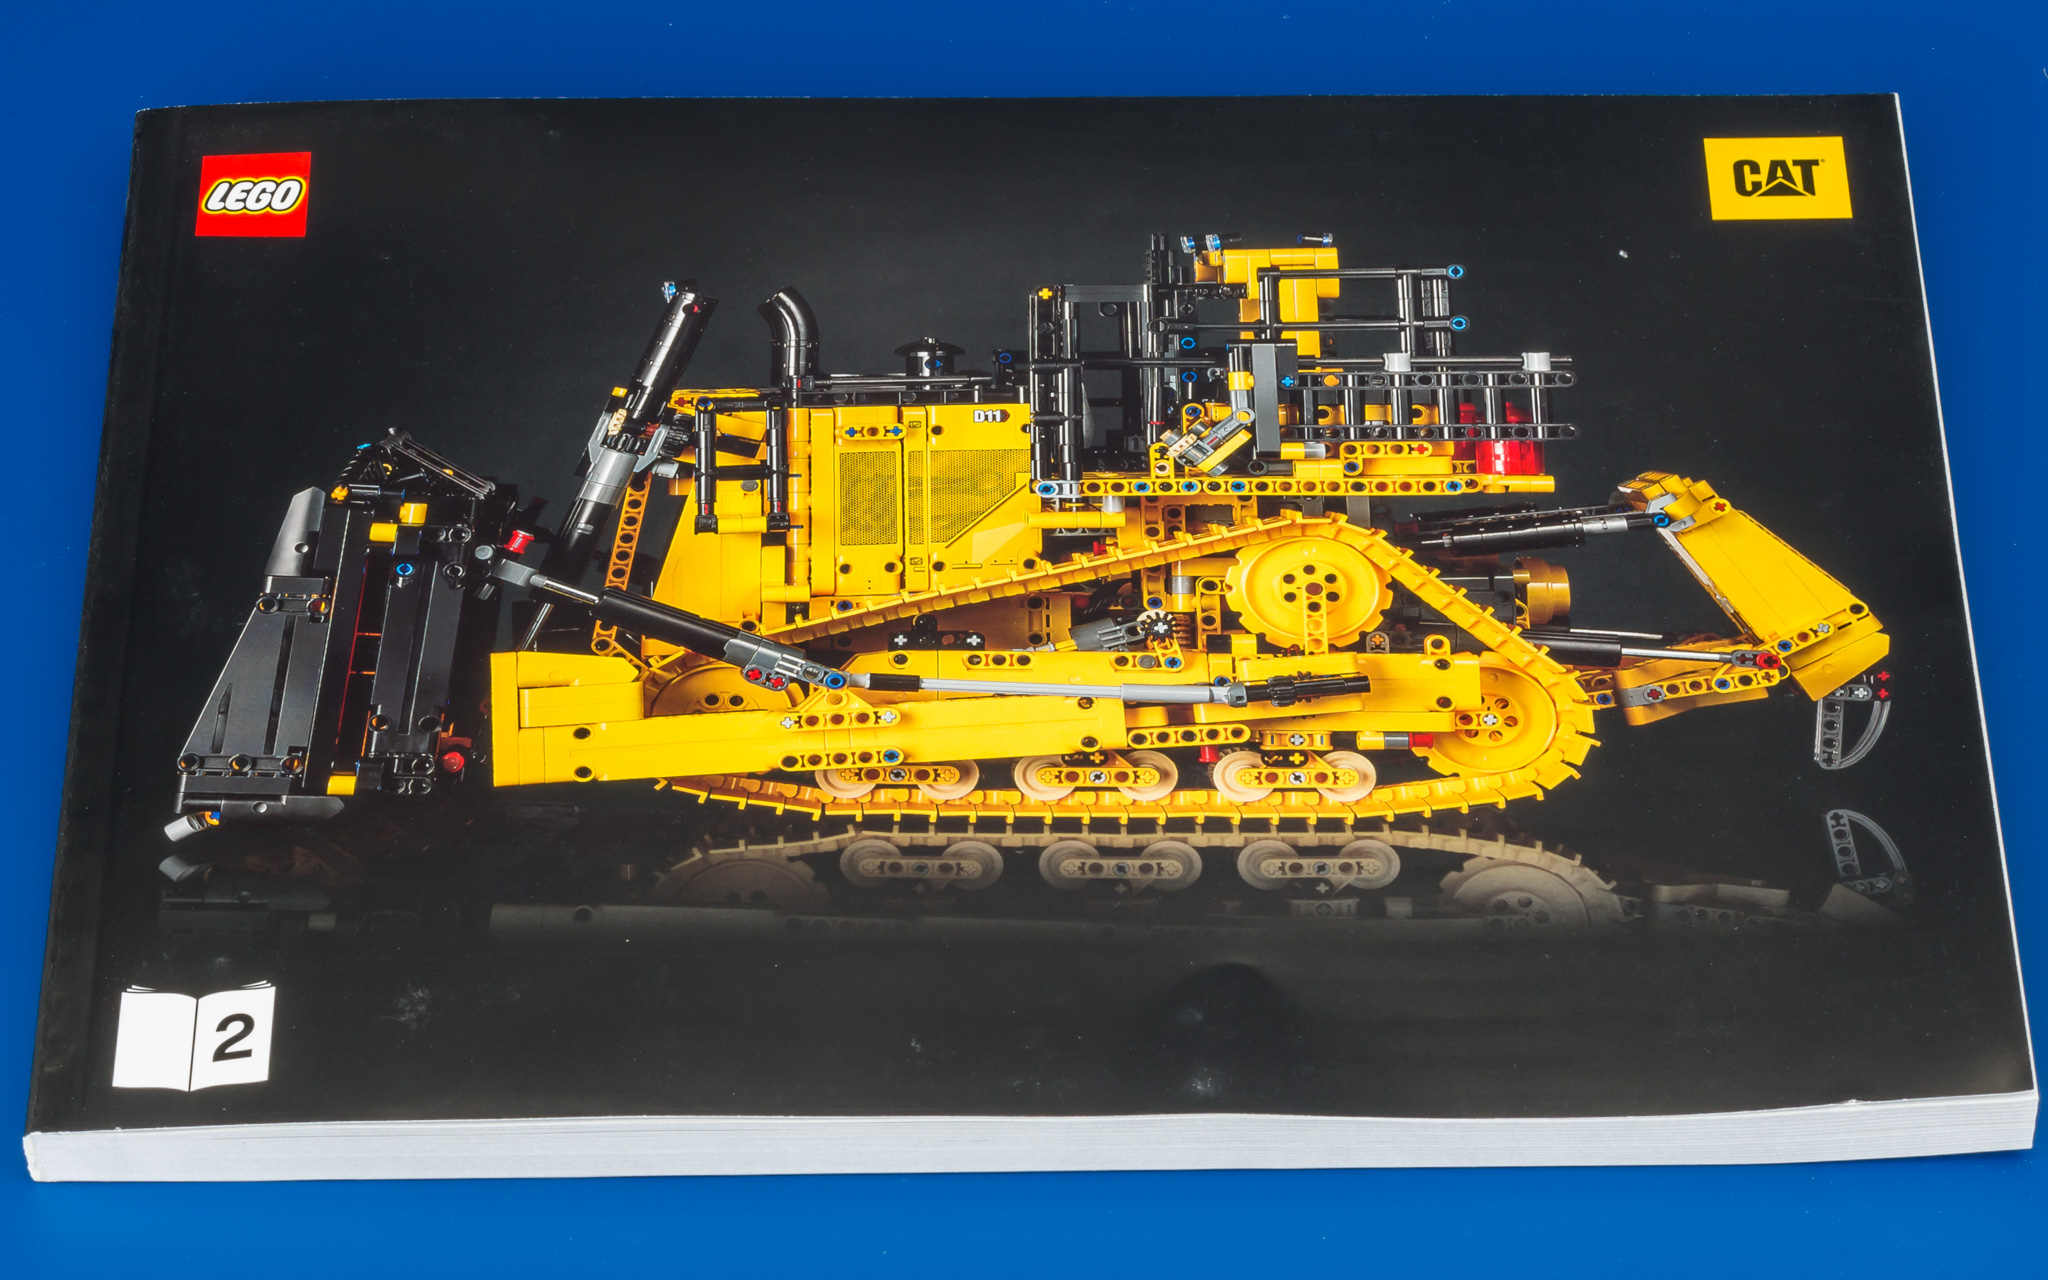
- 2x Instruction booklets (unsurprisingly numbered 1 and 2)
- 1x Sticker sheet (packed with the two booklets)
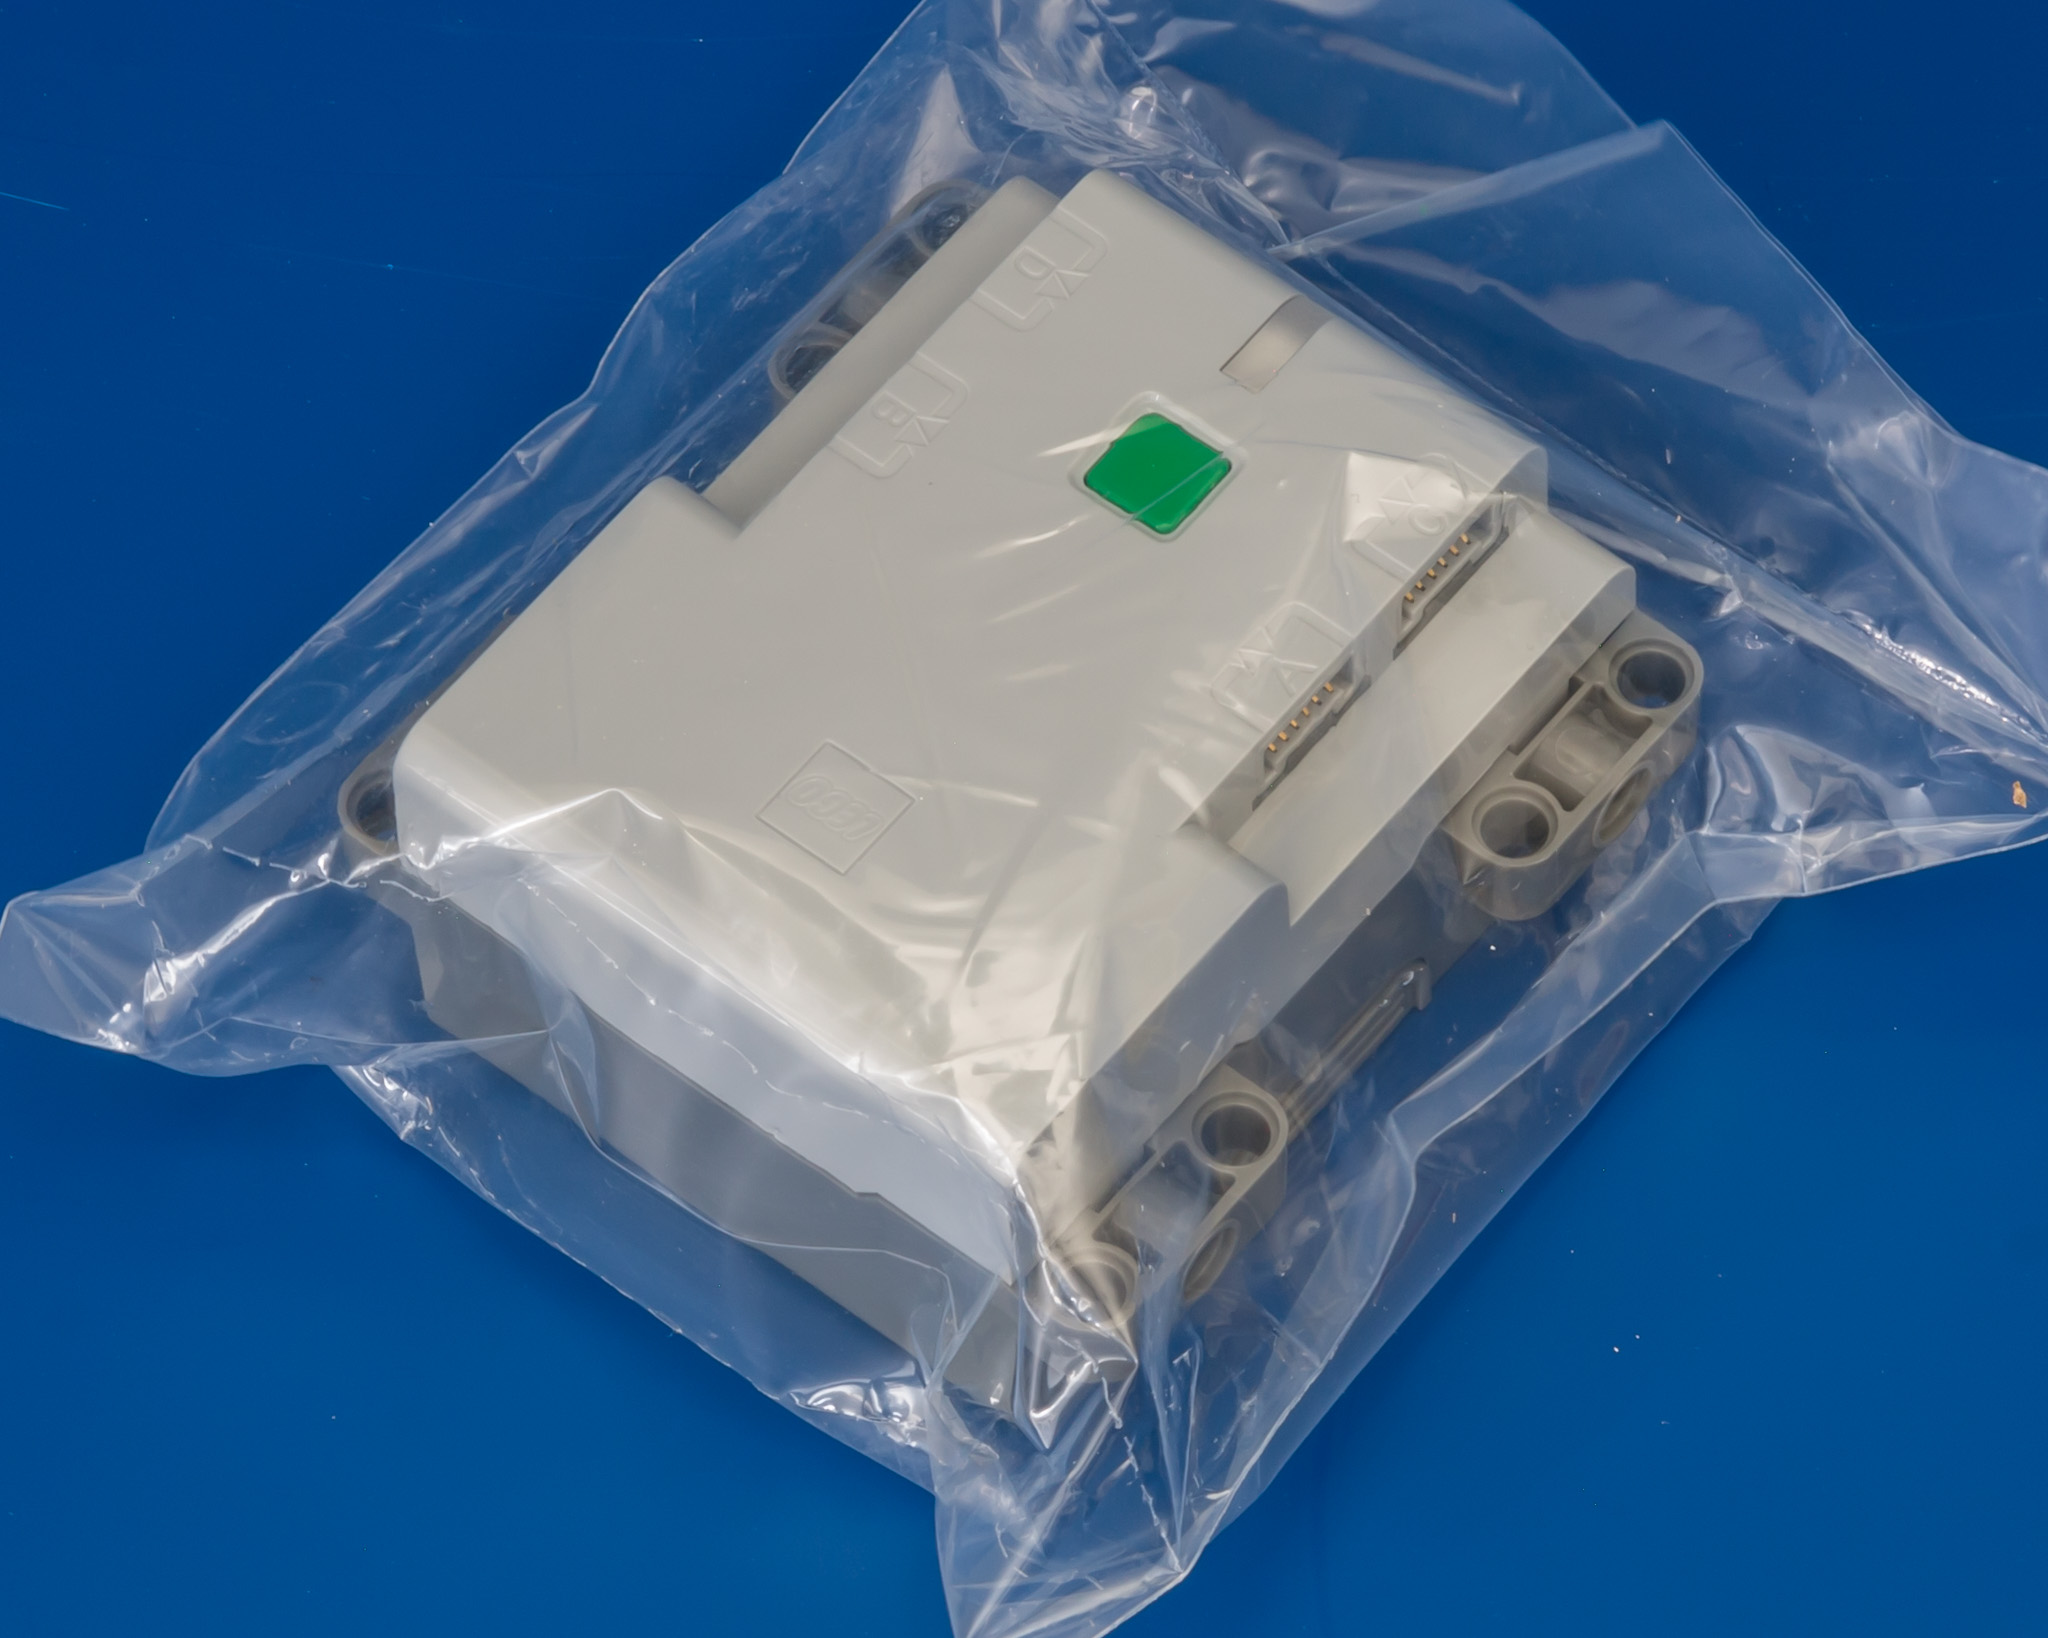
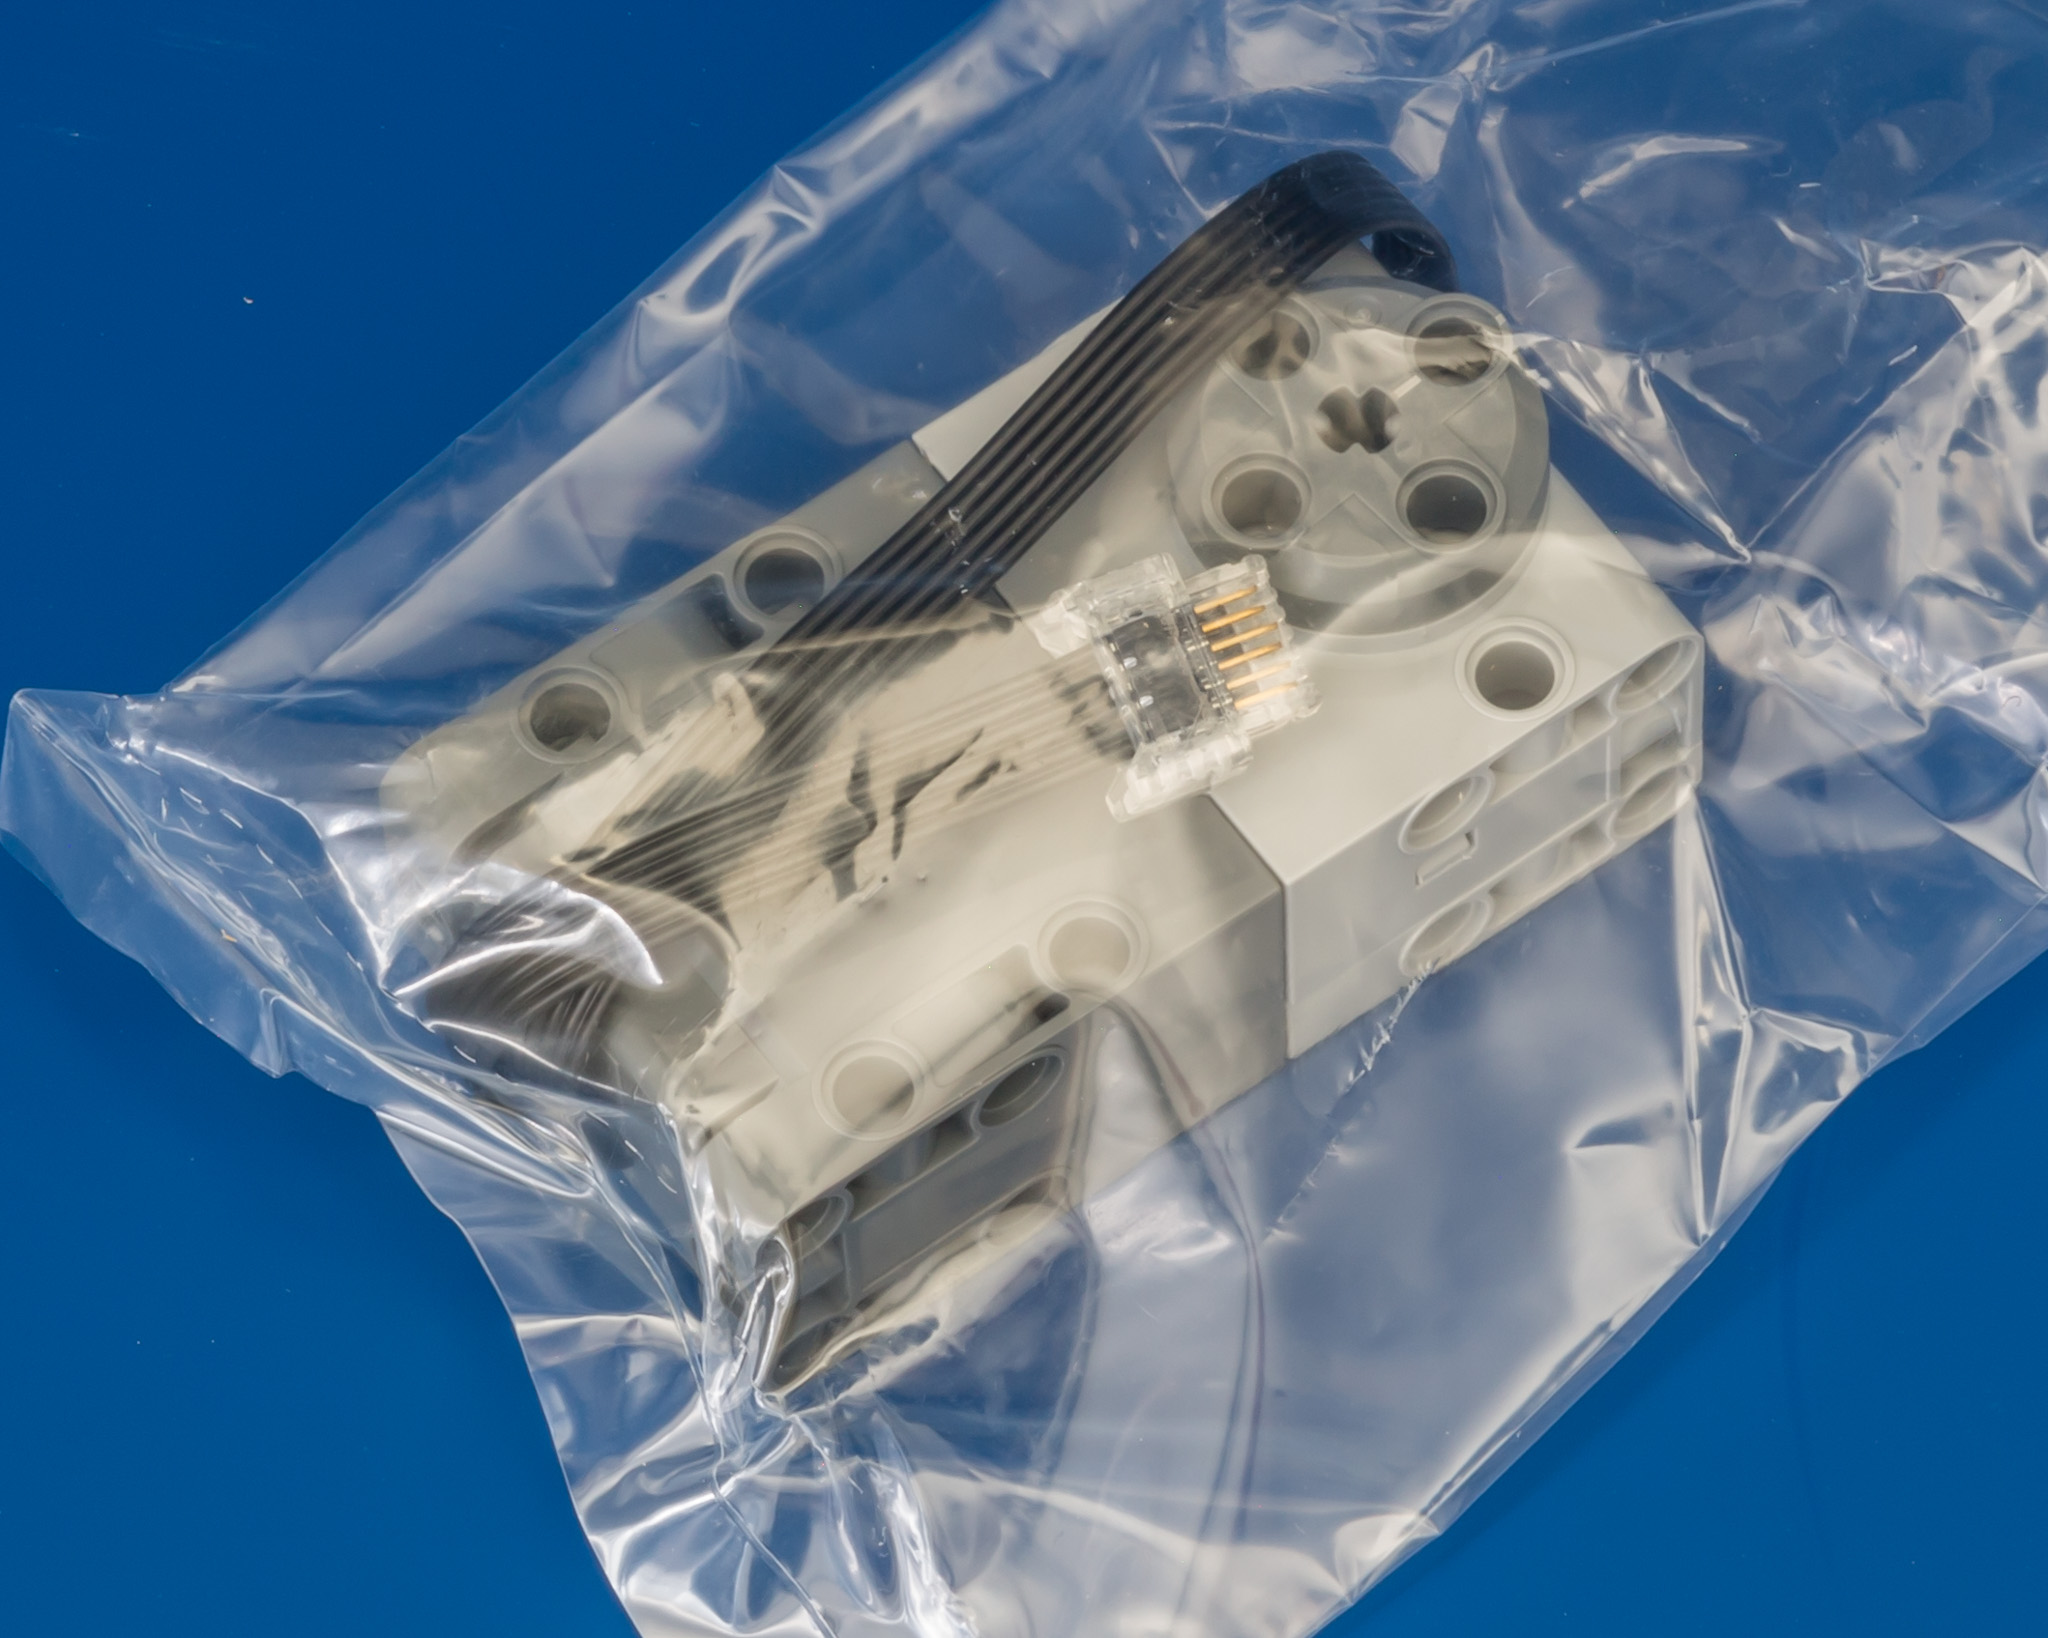
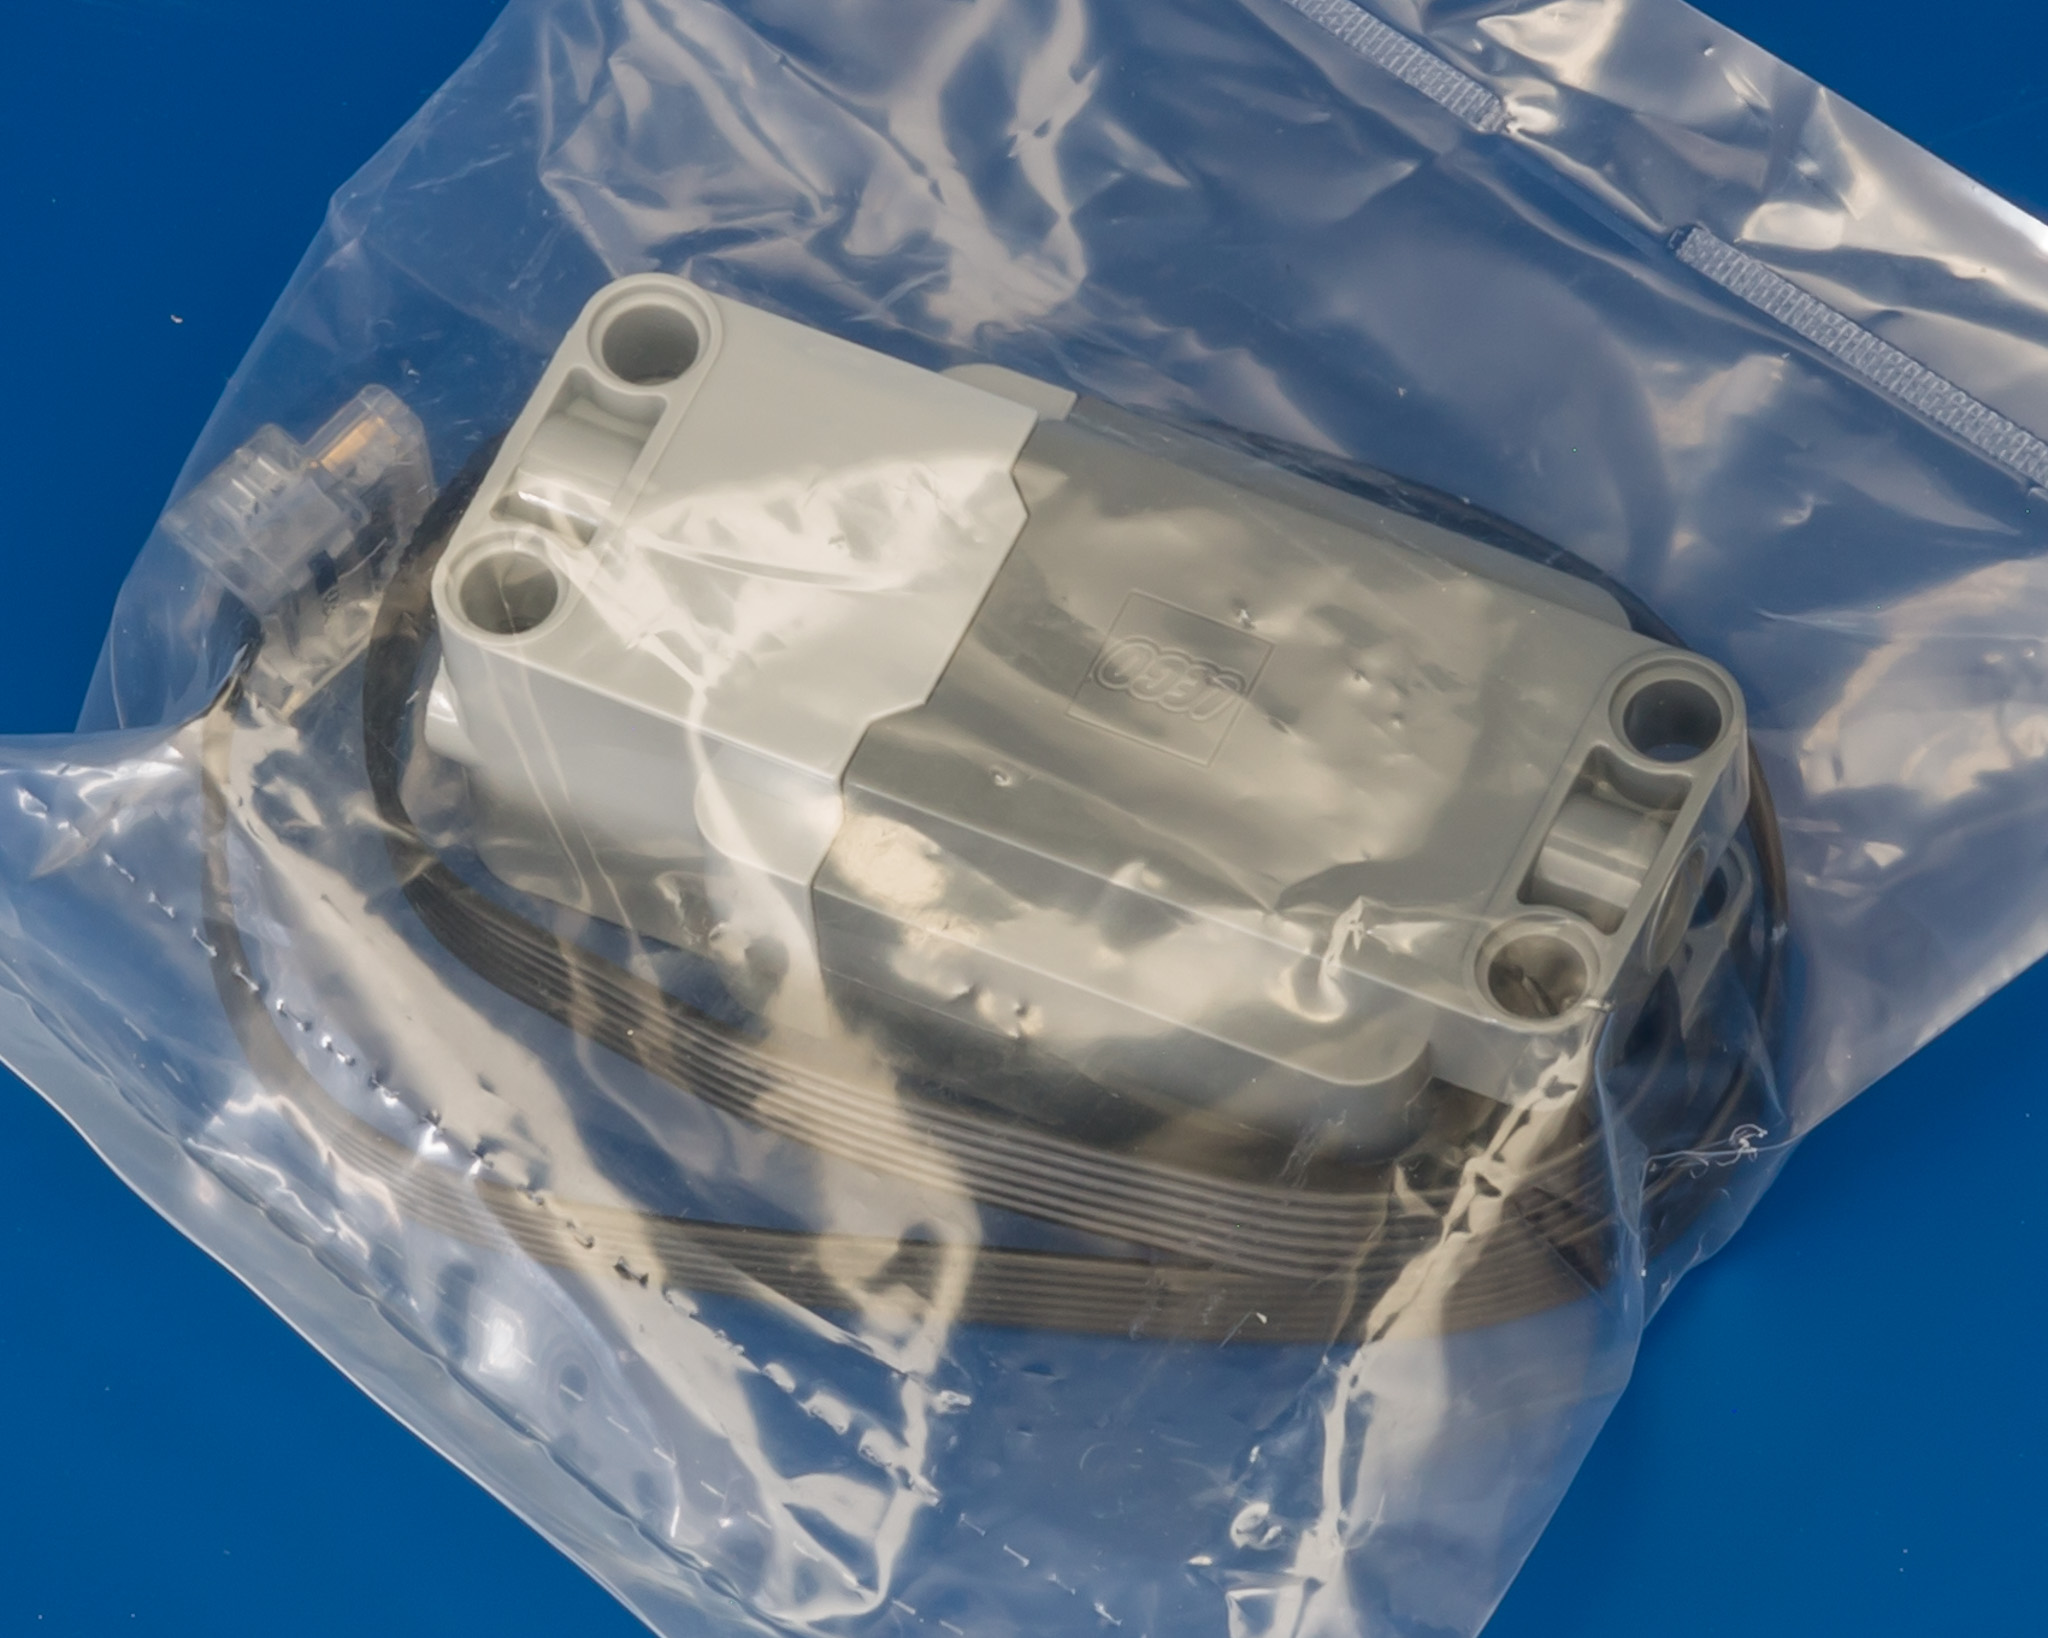
- 1x Powered Up Hub
- 2x Powered Up Large Angular Motor
- 2x Powered Up Large Motor
BOOKLETS AND STICKERS
Like the Liebherr, this set contains two instructions booklets. The booklets and sticker sheet are wrapped in plastic.


The sticker sheet looks better than the one I got with the Ford. While I don't think this model needs the stickers, I like to show this flagship in all its glory. So I will be applying them this time.

INNER BOX
The box contains an inner box, which contains the Powered Up elements and the bags numbered 1 to 3.

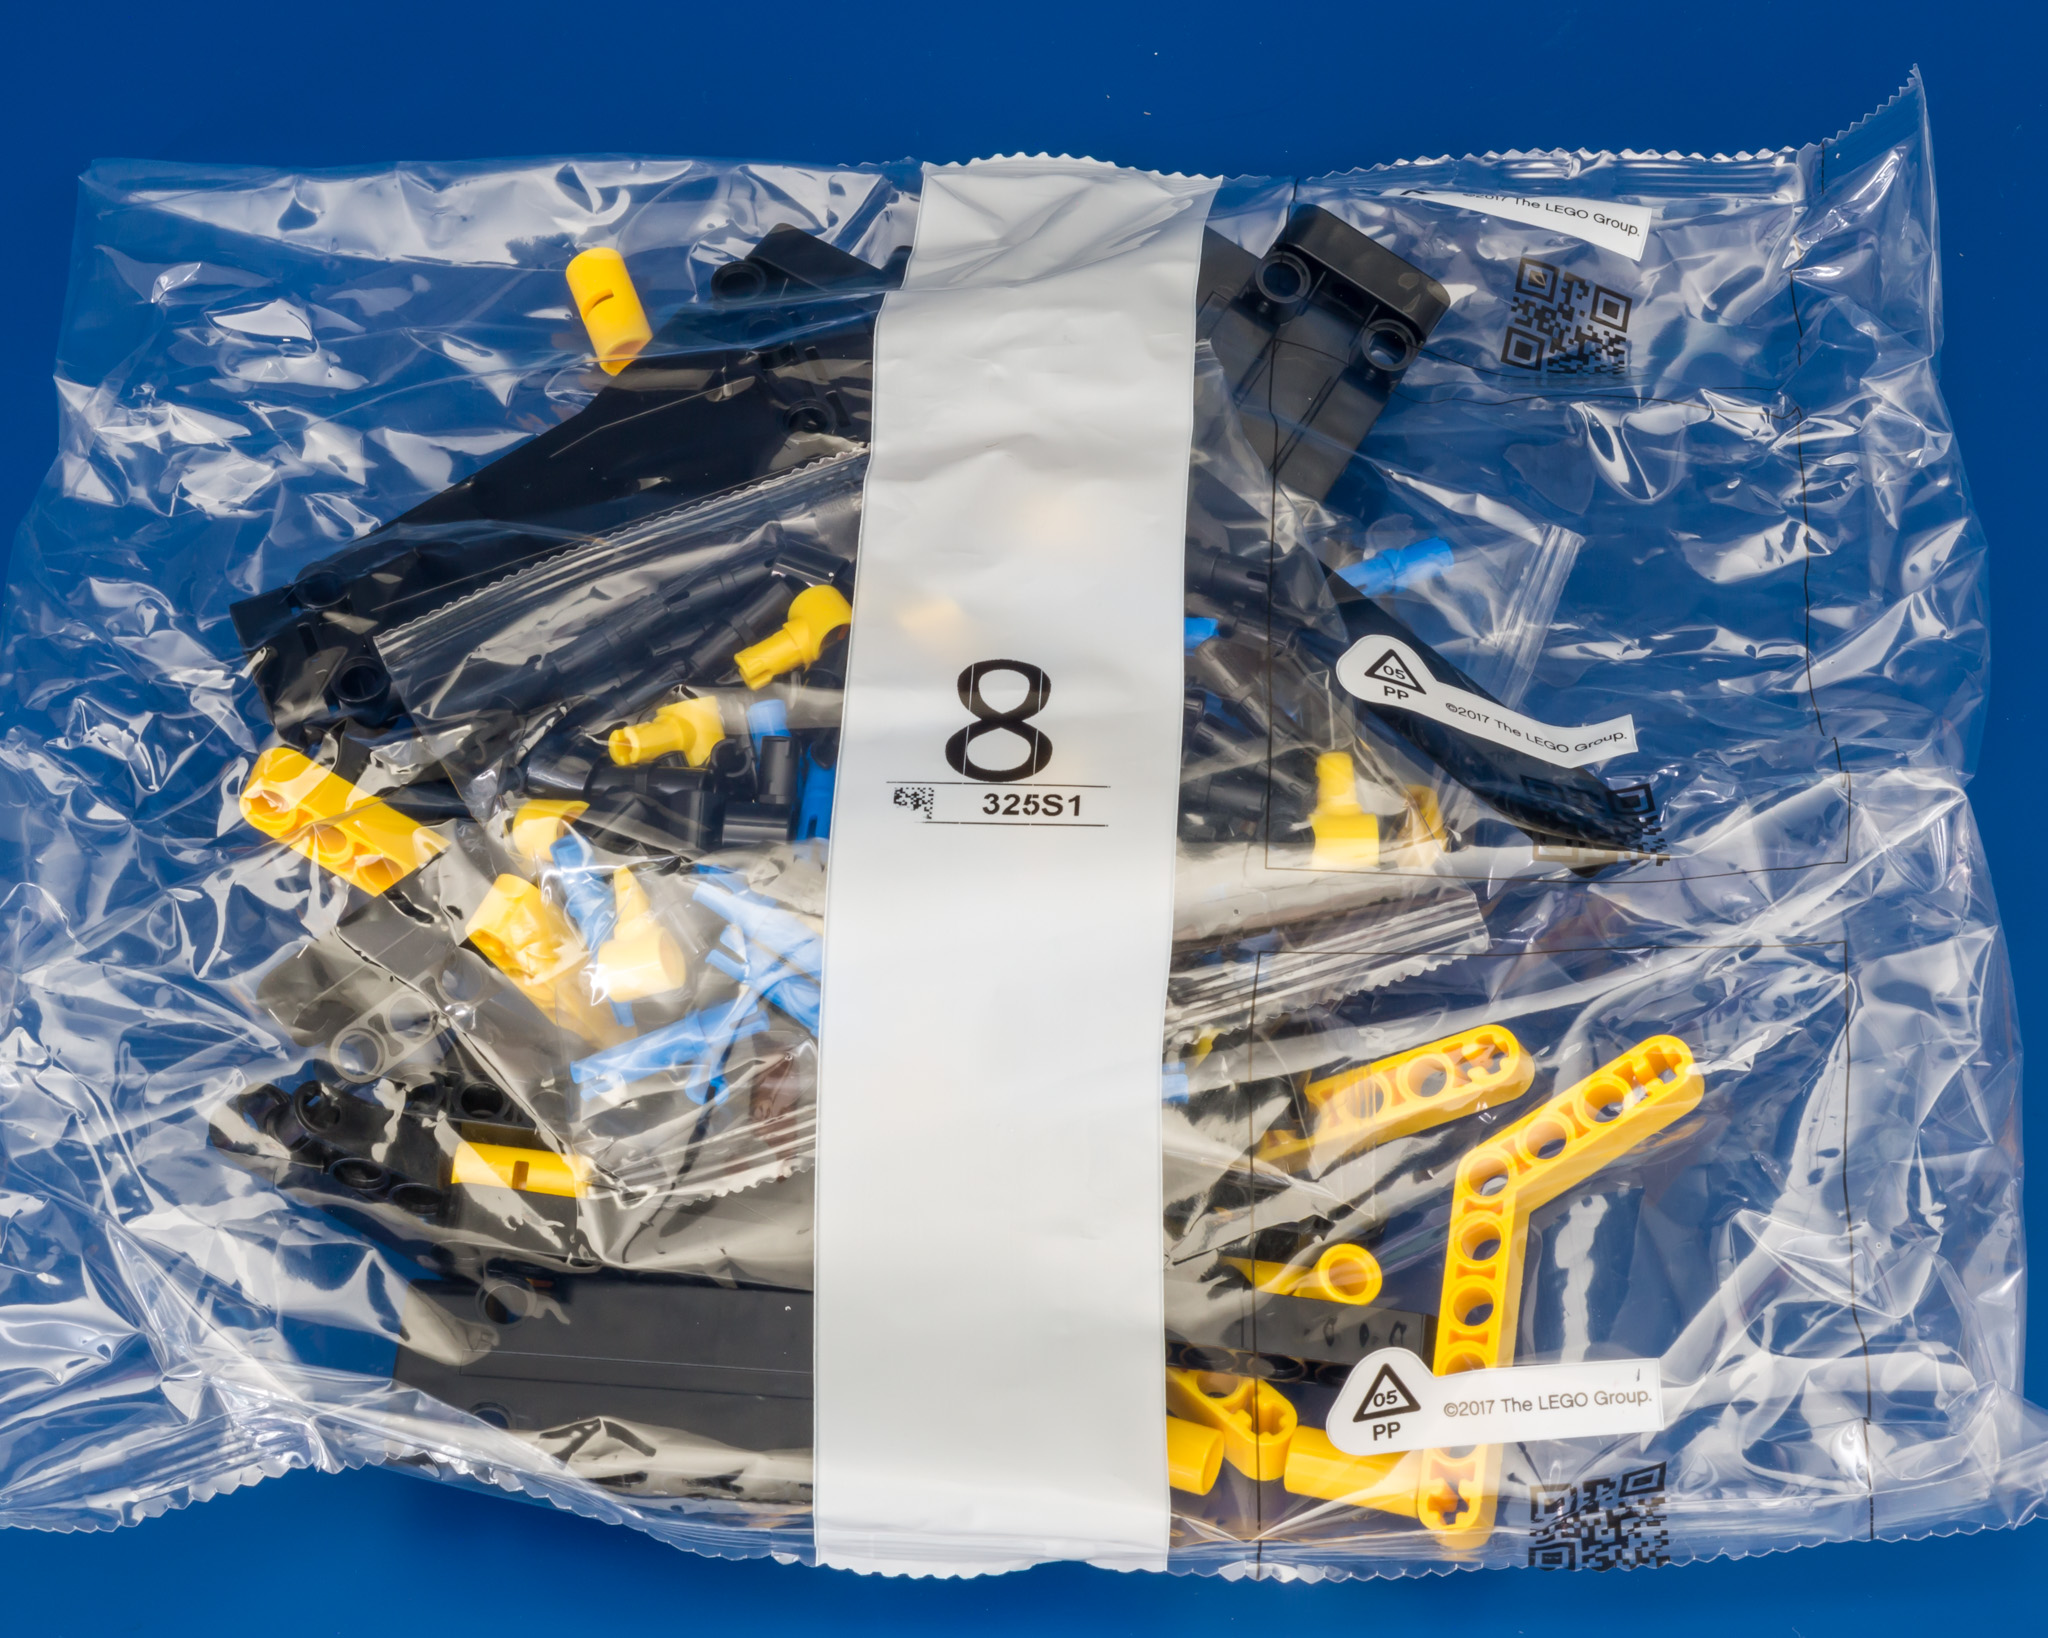
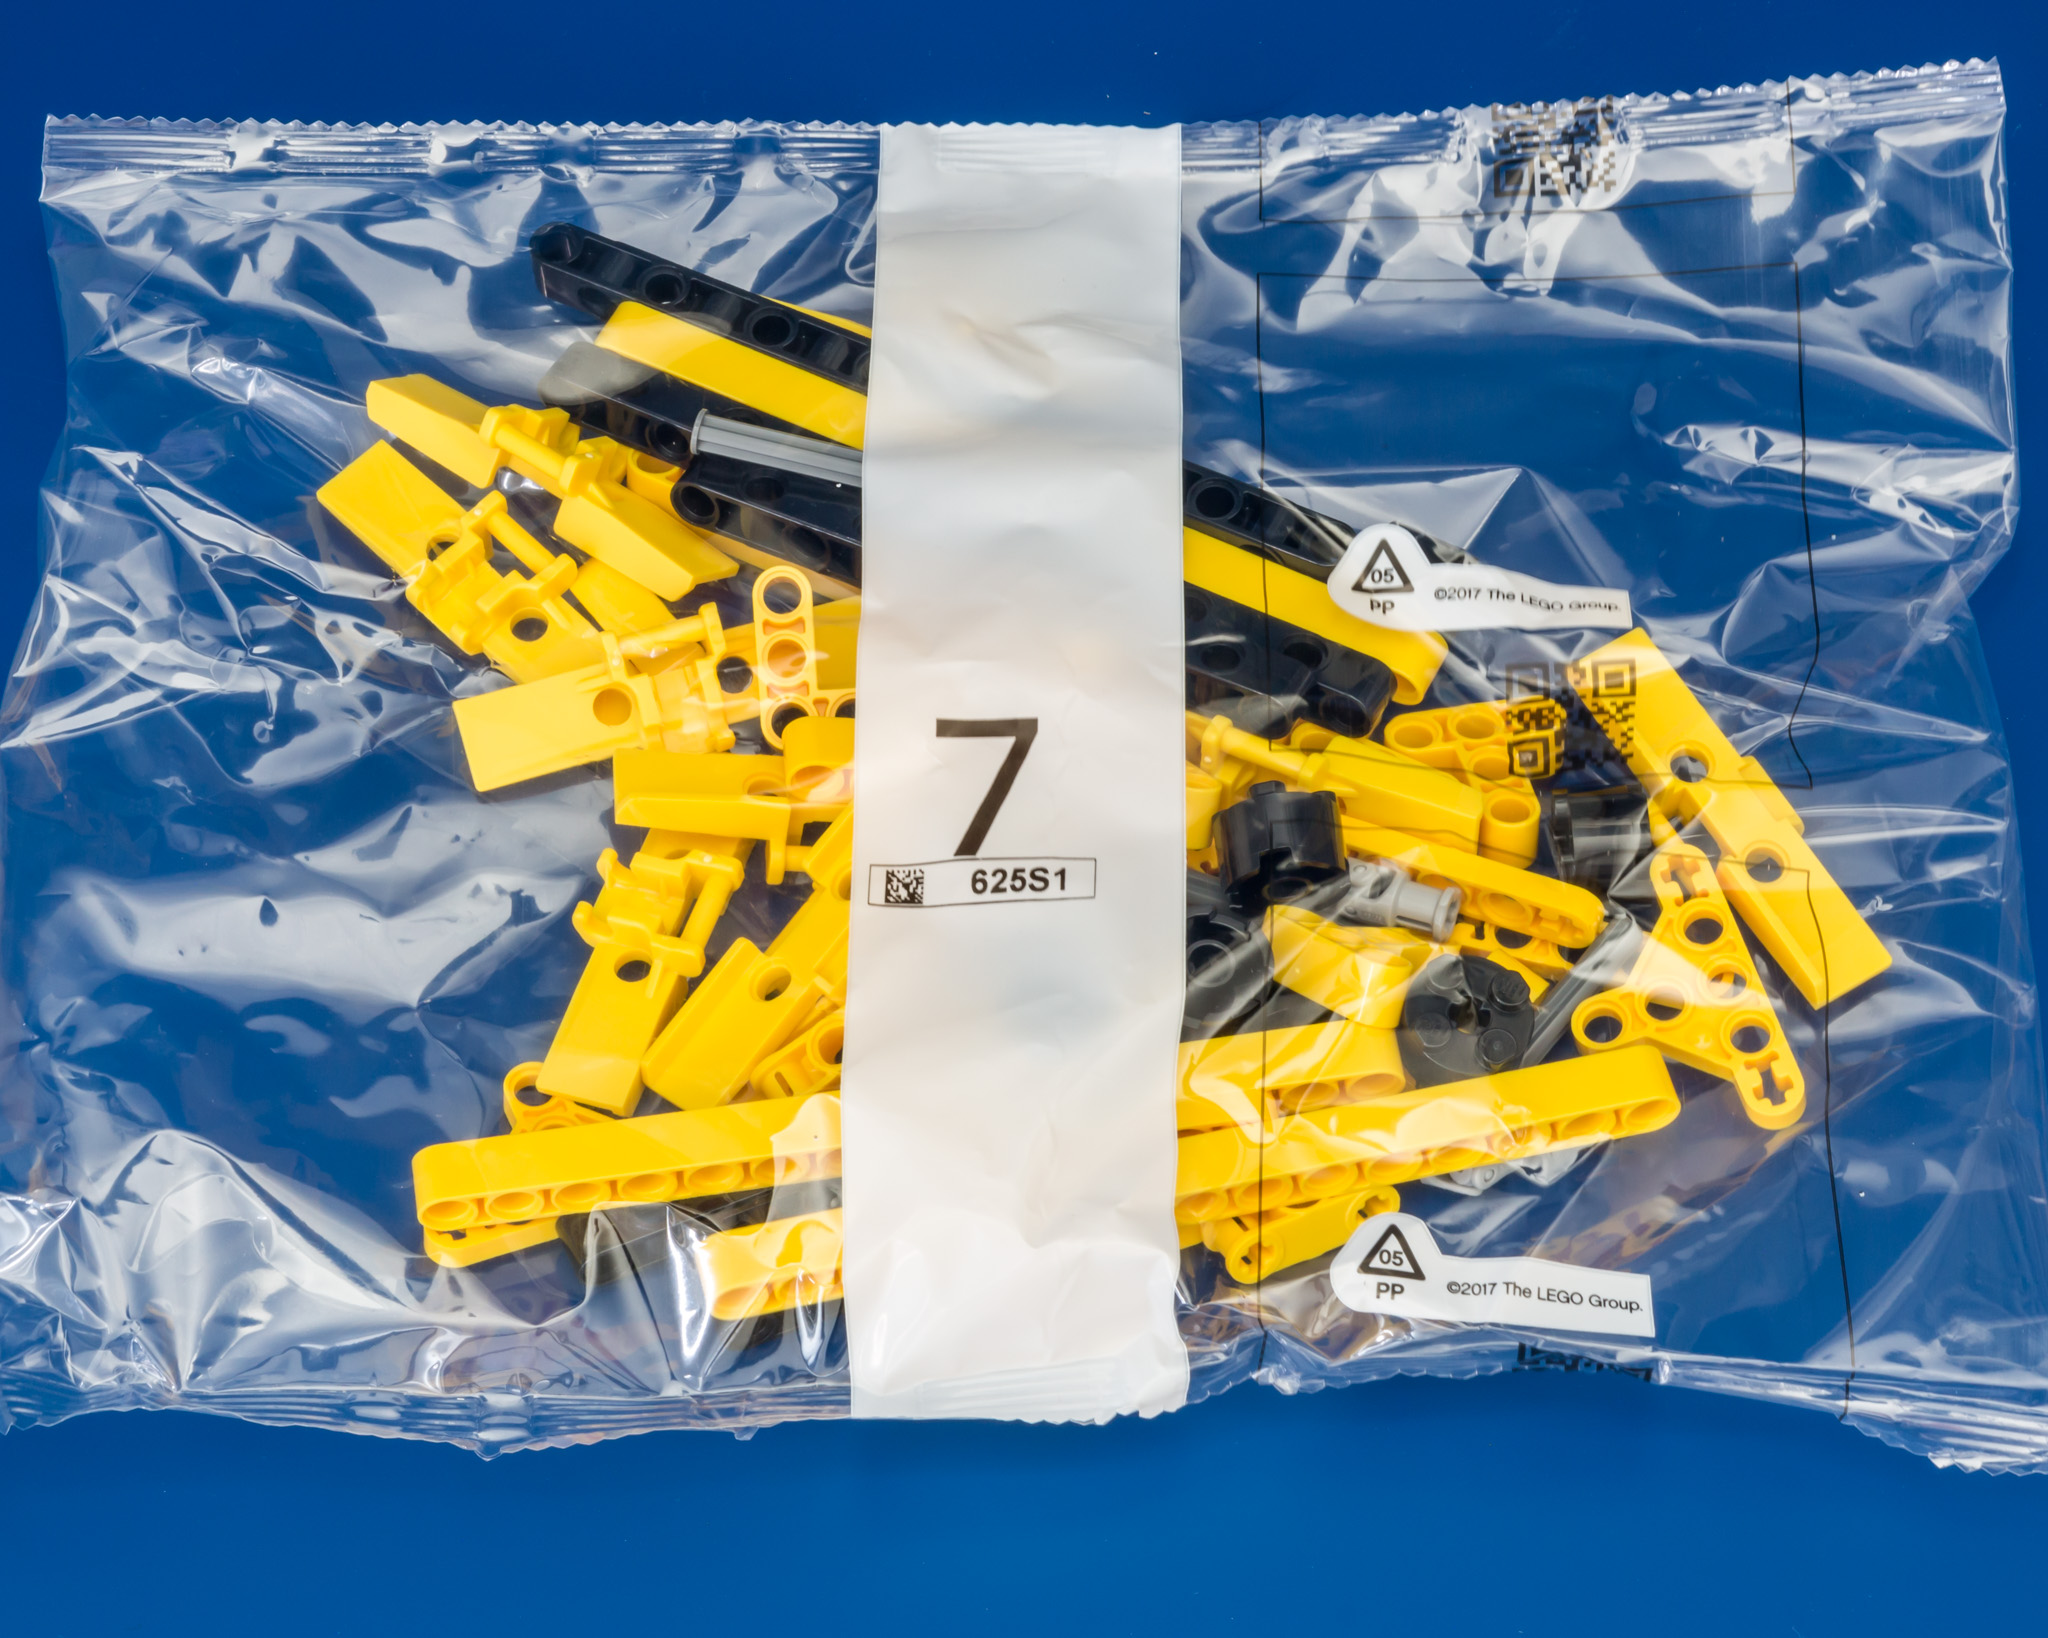
BAGS
There are 28 bags for 8 different steps and 5 separate bags for the Powered Up elements.


HIGHLIGHTED PARTS
This sections describes new, recolored and otherwise interesting parts.
POWERED UP PARTS
This set includes the usual hub and large motors. But it also contains the large angular motor. Which is strangely enough called "Motor Nr. 15" on the side of the box. I have no clue why TLG uses this name. This is the same motor found in the Volvo 6x6 Articulated Hauler.

WIDE LINK TREADS
These new link treads are wider than the ones we usually see in bigger sets. They come in yellow, but I'm pretty sure we will see them in grey or black in a future set. Maybe a snowmobile or snow groomer. The "bigger" an "regular" ones to fit together, so you can mix them....for whatever reason.
The bigger ones are made of slightly different plastic. Seems to be a bit softer. I do think that they need to be even softer, but the plastic does feel like they will have better grip. Downside is that they easily disconnect. More easily than the regular ones.


YELLOW PANELS
This panel already made an appearance in the 42122 - Jeep Wrangler, but in case you missed that one, you will find them in this set as well.

MODIFIED LIFTARM PERPENDICULAR HOLES THICK 1 x 11
Like the other sets in 2021, this set contains the new perpendicular liftarms (which I like to call pliftarms). This set contains 22 x 11L and 18 x 15L pliftarms.

PLANETARY HUB
I recall reading that the angular motors are directly connected to the sprocket wheels. These hubs indicate that there will be some gear reduction, which obviously makes sense. Unless they serve a different purpose. They are included in the first bag so we will soon find out.

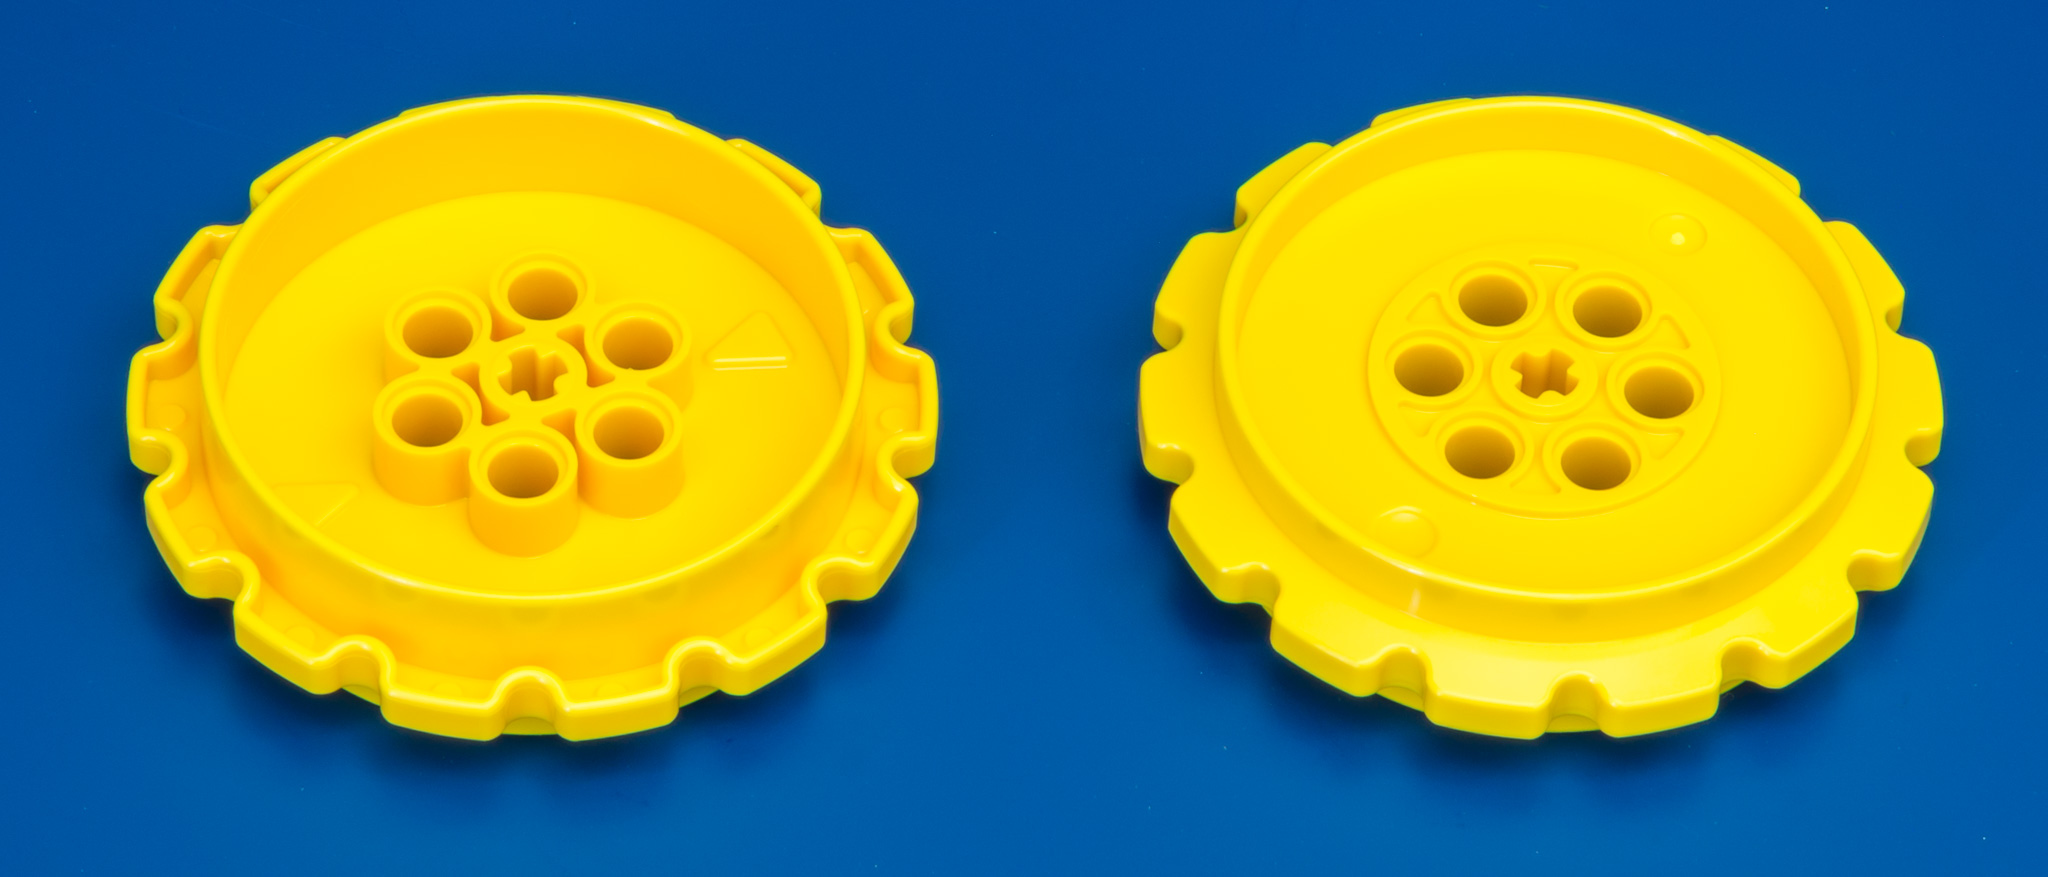
EXTRA LARGE SPROCKET WHEELS
This set contains six extra large sprockets wheels. This part first appeared in yellow in the 42095 - Stunt Race from 2019. It was also released in the Liebherr in dark bluish grey that year. Using the yellow version in the Stunt Racer makes you wonder whether TLG was already working on the CAT that year. The answer, is most likely yes. Like the bigger tread links, this is very useful part for bigger sets.
LINEAR ACTUATORS
For the first time, we get linear actuators with a different housing color (black). I would have preferred the end of the LA to be black as well, combined with black holder blocks. I have to see these new ones on the completed model to give my final verdict.
The mold seems to have change a bit as well, since the casing has a slightly different form factor. Sorry for not putting another LA in the picture. The axle hole is red instead of orange.

2x3 QUARTER ELIPSE LIFTARM
This part already appeared in the Ferrari and three other 2021 sets. To be honest; I am not really sure whether it's new in yellow. I do love this part though.

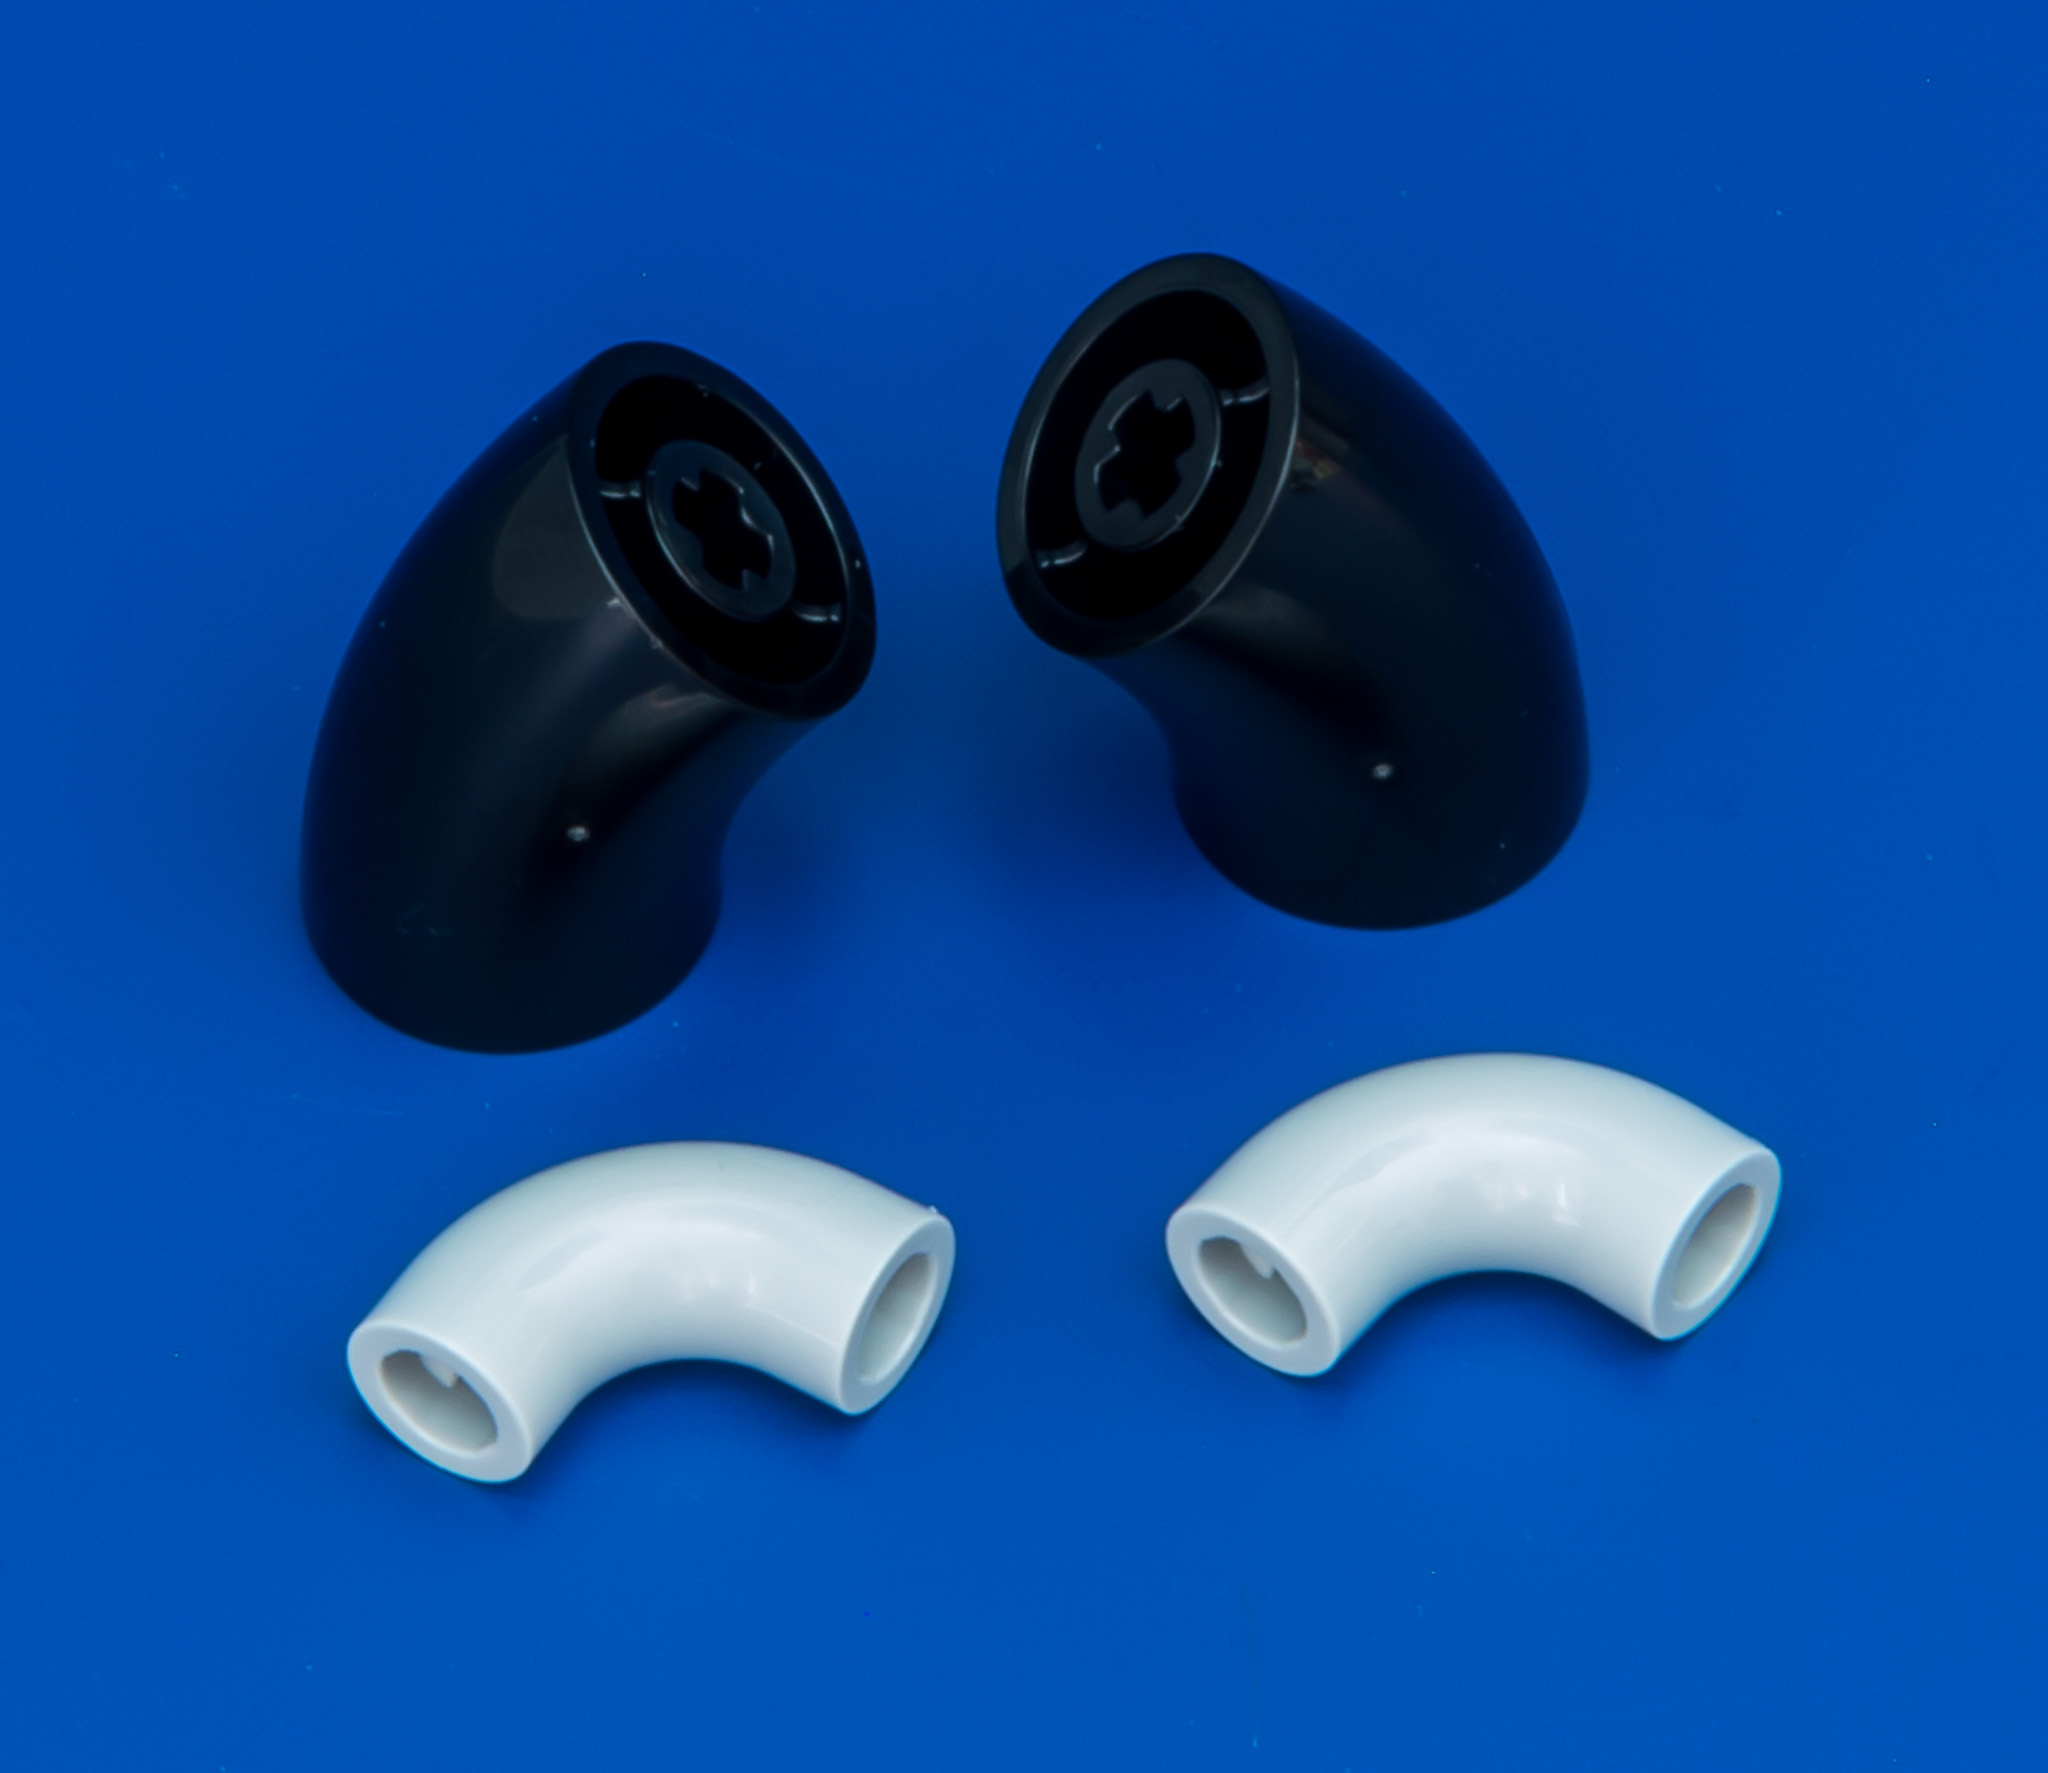
ROUND 2x2 BRICK 45 DEGREE ELBOW
This is the second set containing these parts. The Micky Mouse set from 2020 had the debut. Smaller macaroni parts are for comparison.
YELLOW 5x7 FRAME
One would think that yellow is the third available color, but checking Bricklink it appears it is the fifth color. Reddish brown and medium azure are available too.

1x13 GEAR RACK
By no means a new part, but if you need large gear racks, you will find eight of them in this set. The only set containing more of them (12) is the 42009 - Crane Mk II.

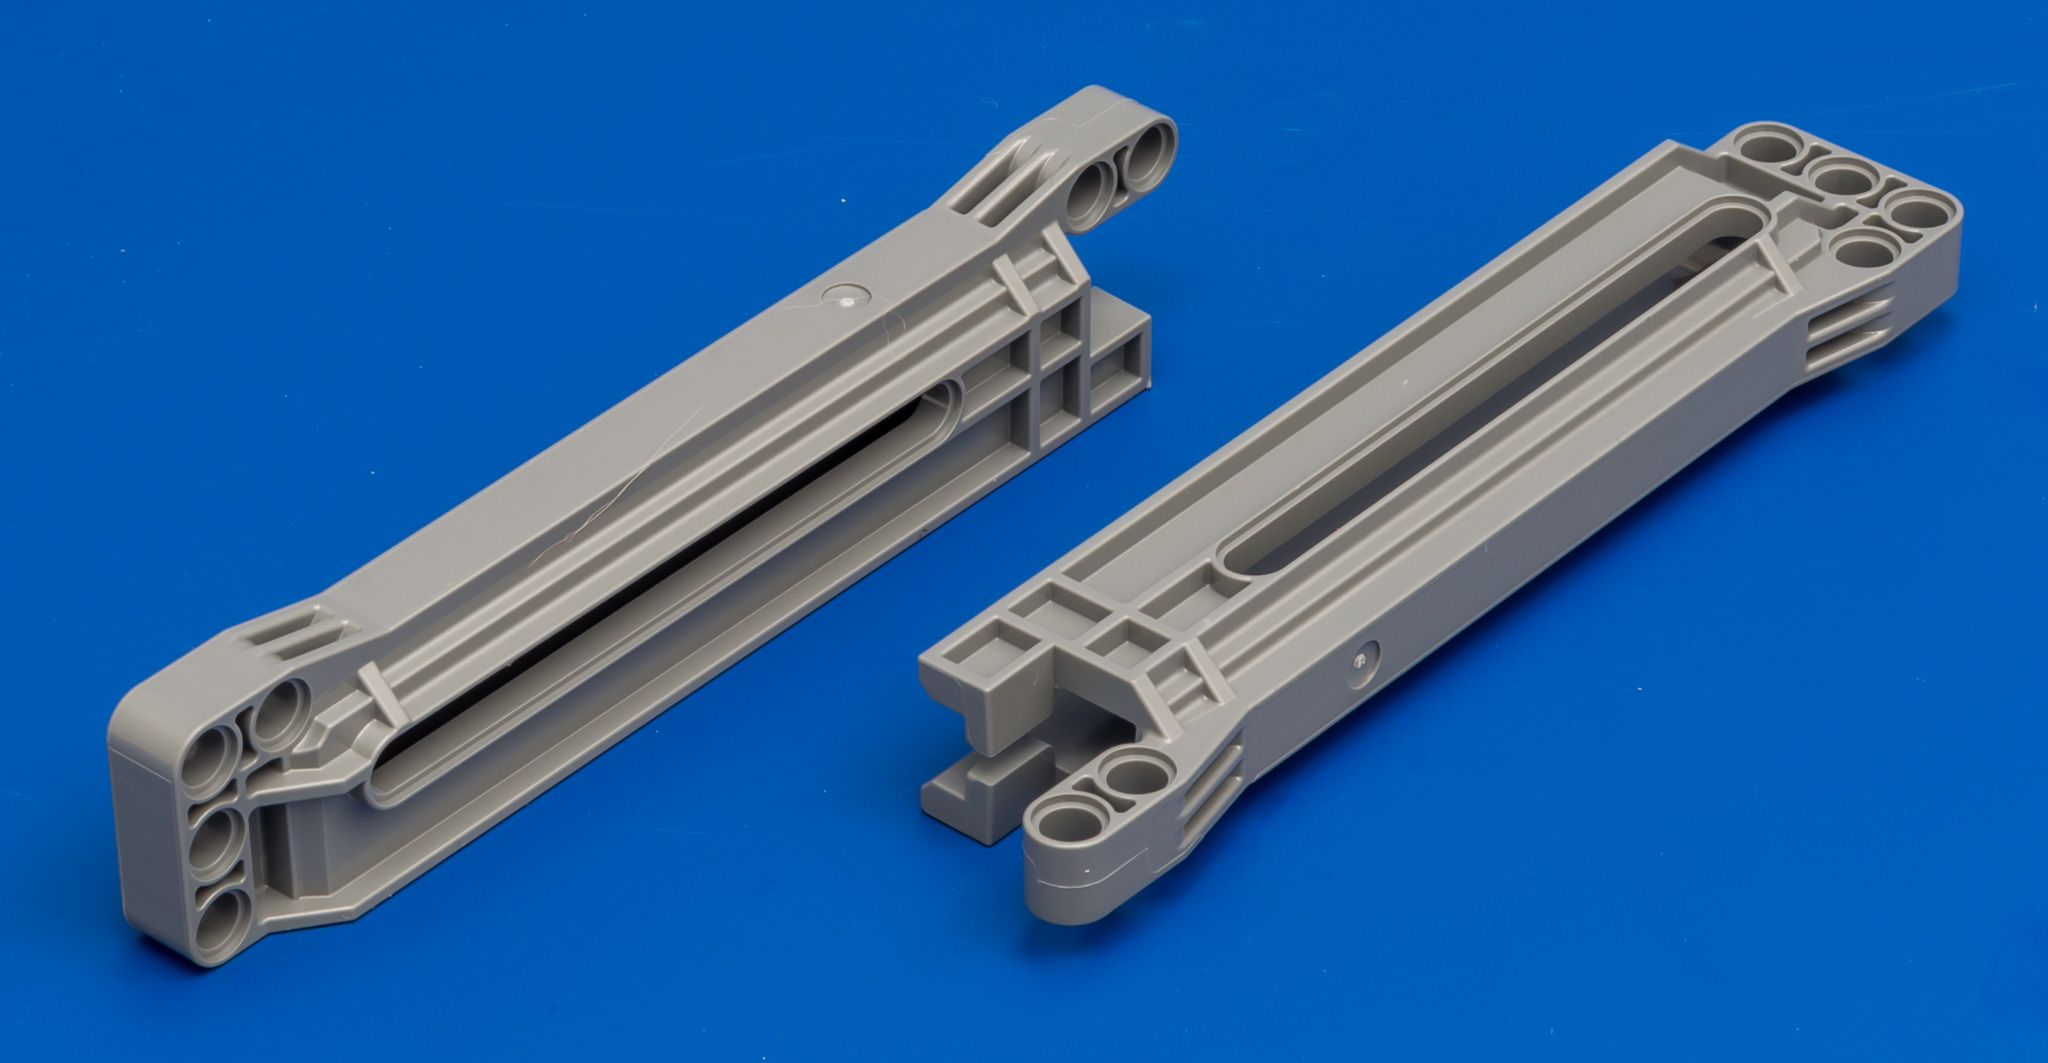
GEAR RACK HOUSING
I haven't seen this housing in dark bluish grey before and Bricklink tends to agree with me.
YELLOW STEERING ARM
If you wondered why the 10295 - Porsche has yellow steering arms, here's your answer. They were needed in this set.

H-SHAPED LIFTARM
This part already appeared in some other sets, but it's not super common.

5L THIN LIFTARM WITH AXLE HOLES
I actually missed this one when I was building, but this part comes in yellow for the first time.
PART LIST
The complete part list for all 3854 parts.


THE BUILD
The first booklet shows two pages with the different parts of the bulldozer. It states that You assemble this model exactly like the real D11T bulldozer. Since I have never built a real bulldozer, I can only assume that's true hehe. It does make me curious whether the build is really modular and the model can be easily disassembled for transport. The plot thickens and my excitement to start building grows.


The booklet shows the eight building phases. The phases don't line up exactly with the assemblies shown above, but it's close.


On the first day I have done unboxing, taking pics of the contents and doing the write-up up to this point. Which means today is all about....building! I will grab another cup of coffee and start the build. On a side note; When I purchased the black backdrop, I ordered a blue one as well. I have decided to use it for this. Like the black one, this one is harder to work with than the grey one, but so far I do like the contrast between the blue, black and yellow. Enough with the talking again....coffee....and building!
I noticed a stowaway one of the bags. Apparently, a single perpendicular connector was traveling with the pins in the small bag. At this point I wondered whether this was a mistake or not. We will find out later :wink:

We don't waste any time integrating the Powered Up elements. We can clearly see the usefulness of the pliftarms (perpendicular liftarms).

The hubs are indeed used in the drive train.

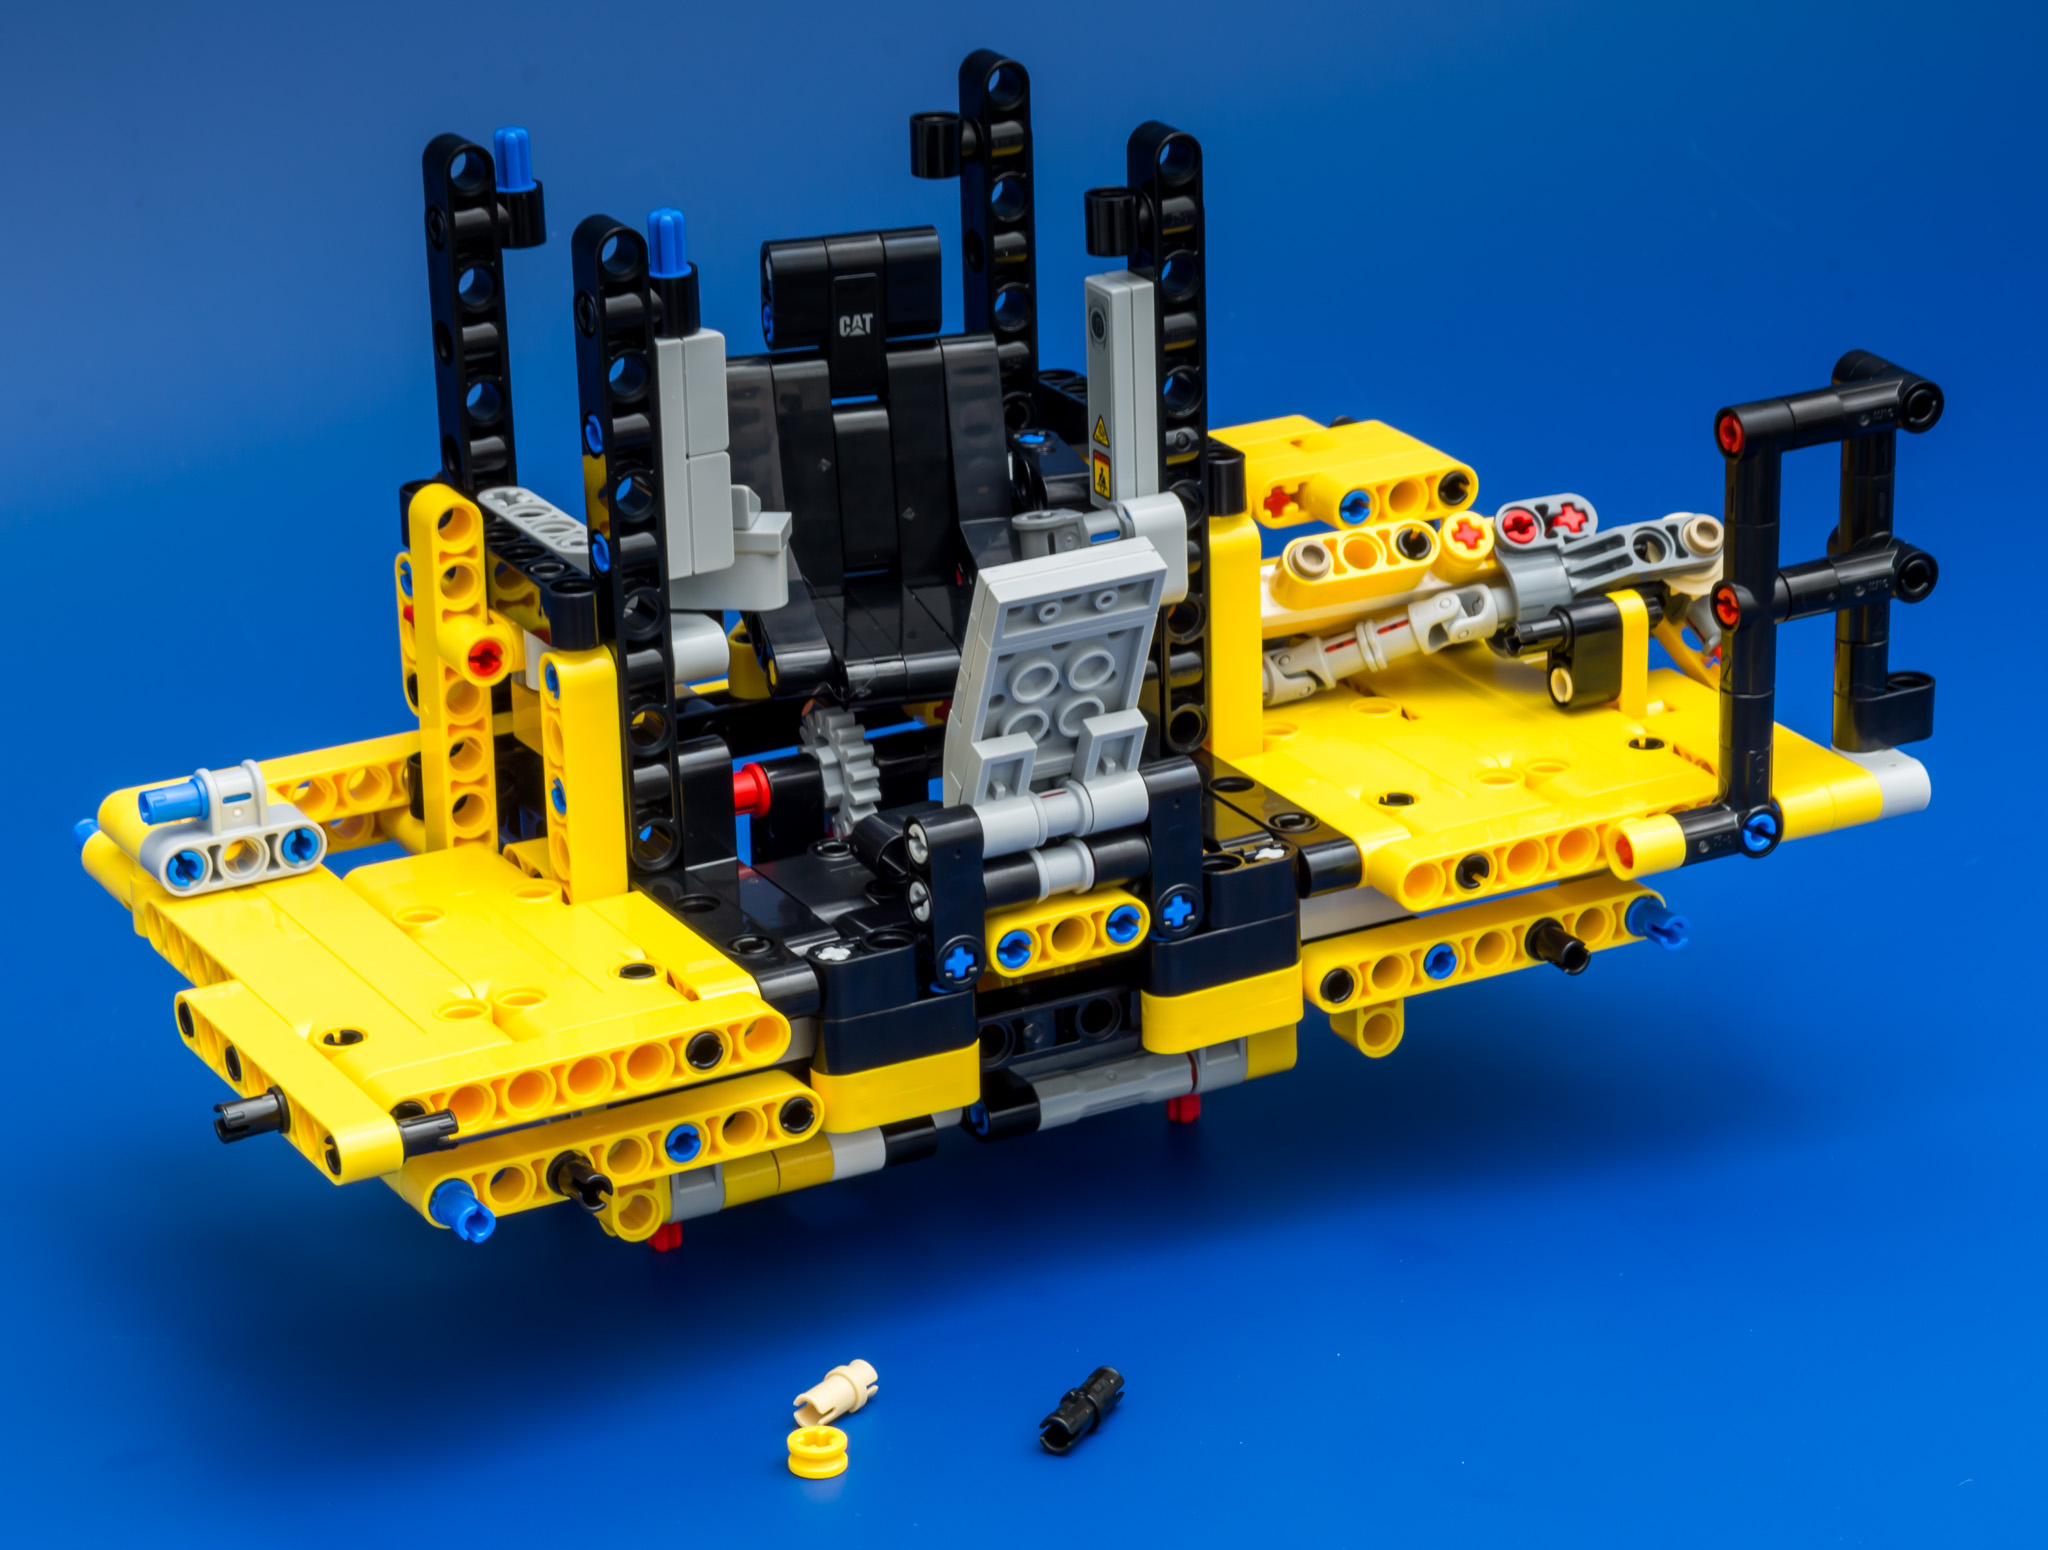
The chassis feels sturdy, like the build of the Bucket Wheel Excavator. Below you can see the mini-mariage of the front and rear section of the chassis, if one can talk about front and rear in this case.


We have reached the end of the first stage and the perpendicular connector has been used, so apparently it's not a mistake. For the first time in my life I was actually missing a piece. I came one blue 3L pin short, which has never happened before. Since I transferred the pins into a bowl to take the picture with the perpendicular liftarm, I assumed to have dropped it somewhere. But I haven't heard the distinct sound of a plastic part falling on the ground. Unless the part turns up somewhere the next couple of days, or I find out I made a mistake somewhere, this is a first for me. But you know me, I do tend to make mistakes :laugh:
And just when I finished typing this sentence I noticed I duplicated a step in the book, which didn't need replicating. And guess what....it uses a 3L blue pin and 1L connector. That's why I didn't have a spare 1L connector, which you usually do. So close, yet so far away. Still a "missing piece virgin" :laugh:

And here's pic of the completed first stage.

During the next stage we will be building the upper part of the chassis and make a start with the tread assembly. It will take quite some time before we can do a driving test, so I might hook up the motors at the end of this stage to do some test. Come to think of it; the wires will probably be connected in this stage anyway. Let's open the bags.
Right off the bat we will be using the two large motors. I like the fact that this part of the build is symmetrical, while both motors are used for different purposes. Allegedly, because at this point I don't know what both motors will be powering.
This assembly contains the gearbox, which uses quite a few gears. Building the gearbox is something I always enjoy and this one is no exception. It isn't overly complicated, while it does use a lot of red 16T clutch gears. The linear actuators are mounted to this assembly as well.

The picture below shows the, more or less, completed gearbox with the LA's attached. Granted, the gearbox is pretty simple, but at least this model has a gearbox, instead of the motors directly connected to each function.

A few steps later the assembly will be attached to the chassis. At this point the model is already growing quite heavy and it feels as solid as a rock.

After a few more steps you reach step 198, where the booklet indicates it's time to start the app and test the model. I reckon that it's the right time for me to do some testing as well. Since I don't have the app yet, I will try to hook up the Powered Up to do some custom tests. When I connected to the Powered Up app, the screen showed a message that I needed to remove the cables. After I removed them the app started updating the firmware. Now I need to put the cables back in the right slots :tongue:

When I connected the app to the hub again, the hub started blinking blue and orange. I was sure my batteries were charged, but after replacing the batteries with fresh ones, the problem was gone. I was able to operate all four motors. One of them is a bit tricky because it switches between two modes and uses a stepper motor to rotate 90 degrees clockwise or counter clockwise. I can probably simulate that with the Powered Up as well, but for now my test succeeded. For now, it's all about continuing the build and completing the second stage. Although, I had a bit of a break since Max Verstappen won the Dutch Grand Prix half an hour ago. I can watch TV and build at the same time, but I had to focus on Max for a bit hehe. But I'm back to building again.
I have come to the end of the second stage and I have one 3L liftarm left. Back to the drawing board hehe. Found it. I simply forgot to add it to one of the side panels.

This is the third day since I started the build and I am at the third step. So far, I average at one a day, which is a pretty lousy score. On the other hand, I am enjoying the build and I not rushing things. And yes, I still make mistakes hehe. This step we will focus on the front of the vehicle, save the blade.
The vehicles packs a massive V12 engine, which you don't see every day in a Technic model. You can see the engine and some additional motor/exhaust parts in the pic below, before we cover it up with panels.

From a slightly different angle.

Covered up with panels.

All of the gear racks are used to create to front grill.

It takes 313 steps before the first sticker is applied. Almost at the end of the third stage. I will leave the last part for tomorrow. I'm having a blast building this big fella and I can't imagine that I am not even half way. It's a bold statement but at this point I am thinking that this set has a chance of dethroning the 8043 as my #1 set.
Great thing about this set is building things you haven't built that often before. It's not a chassis with four or six wheels, a cabin and a flat bed. Almost every assembly in the build is unique and interesting. Take the linear actuators for example. The drive train to motorize the front LA's is simply amazing. It's hard to imagine that the LA's will rotate while being powered all the way from the bottom the chassis.

Here's the entire model at the end of the third step. No extra left-over pieces this time hehe. Up until now the build hasn't been modular at all. Looking at the picture at the start of this chapter, that's about to end. The separate tread assemblies will be built in the next step. According to the picture these assemblies are modular. I do wonder whether we will finish all the modules, before assembling the entire model.

Usually I am not too fond of building the carriages, but just like the previous parts of the build, these carriages are fun to build. Here's a picture where you can see the innards of the carriage.

I only finished one today, so I will leave the other one for tomorrow. And yes, I did peek in the manual to see whether you will attach this carriage to the model.

The answer is; yes, you will attach them to the model directly. Of course, I am a bit disappointed by this, but I guess I set my expectations bar too high.
A new day, a new step. But not until I finish the other carriage. Here's a picture with both carriages attached. I had another case of "missing a part". I had to get a black 3L connector from my own inventory, to have a spare 3L axle with stop at the end of this stage. Since only one 3L axle with stop is used on each side, this was easy to find. I made a mistake yesterday, because it's easy to miss the difference when lighting is dim. I reckon this is the main reason why a lot of people claim to be missing pieces. But they don't tell you which pieces they have extra :tongue:
This marks the end of the first booklet. The second one is slightly thinner, so I am about halfway. During the fifth step we will make a start with the rear upper part of the chassis, which is basically the cabin assembly. We will only finish the cabin half way, as you can see in the picture below. This step contains a weird building step. At step 711 you will be working on the assembly to rotate the steps at the side of the vehicle. I have to look three times, but you have to apply some pressure and somewhat "bend" the assembly into place. The booklet clearly states that this is what we are supposed to do, but I had to check anyway. Not sure if it's illegal or not, but it sure feels that way.
It's Thursday now and I just finished the fifth step. Since it's still quite early, I have a chance of completing the sixth step tonight. I am anxious to finish this step, because bags numbered 7 contain the new treads and I can't wait to attach them to vehicle. But first things first.
For the first time, I finished a complete step in a single night, hooray. The build went pretty quickly. Usually the chassis is the most interesting to build and the bodywork/cabin can feel like a mandatory steps to finish the model. That is definitely not how this step felt. Building the cabin is actually rather enjoying. Below you can see the ladder attached to the cabin.

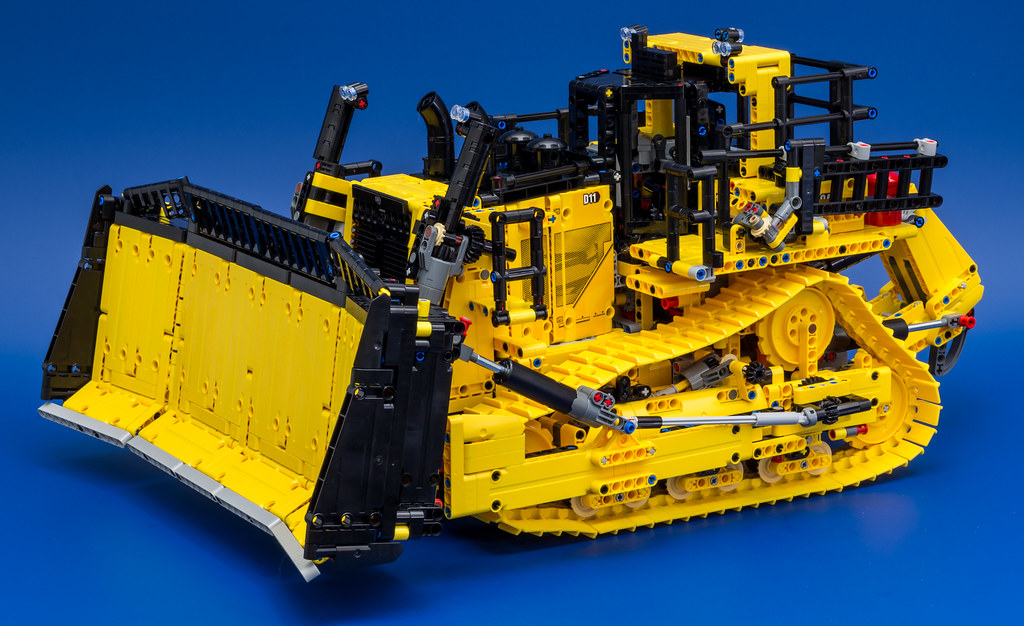
If I recall correctly, this is the third "marriage". This one actually feels like a modular build, since the cabin can be easily attached and detached. I almost tripped when I went upstairs to take a picture. I can't imaging the horror, tripping with this model and finding the pieces scattered all over the place. Well, that luckily didn't happen and thus I can present you the following picture. A picture cannot express how HUGE this thing is. When I first saw the "silhouette" image I wondered where the 4000 odd parts would go, but it is all clear now. Granted, the Bucket Wheel Excavator was huge, but this feels massive.

Ready for tread link assembly!

The penultimate step. We will finish everything except the ginormous blade. There is something weird going on with the fake LA's though. There seems to be enough room for another 2x2 round plate. My buddy @kbalage has confirmed that there is enough space. I am not sure why TLG decided to omit the plate.

It took a bit of tinkering to add the tread links, but I had to manually rotate the knob to reduce the distance between the front sprocket and the rear ones.

I was so excited that I forgot to add the left-over parts I had stored in my pocket to this picture :laugh: So here are the left-over pieces for the final step and all the left-overs in a single picture. There are indeed two extra tread links. I do think these can easily be added, since you can adjust the tension.


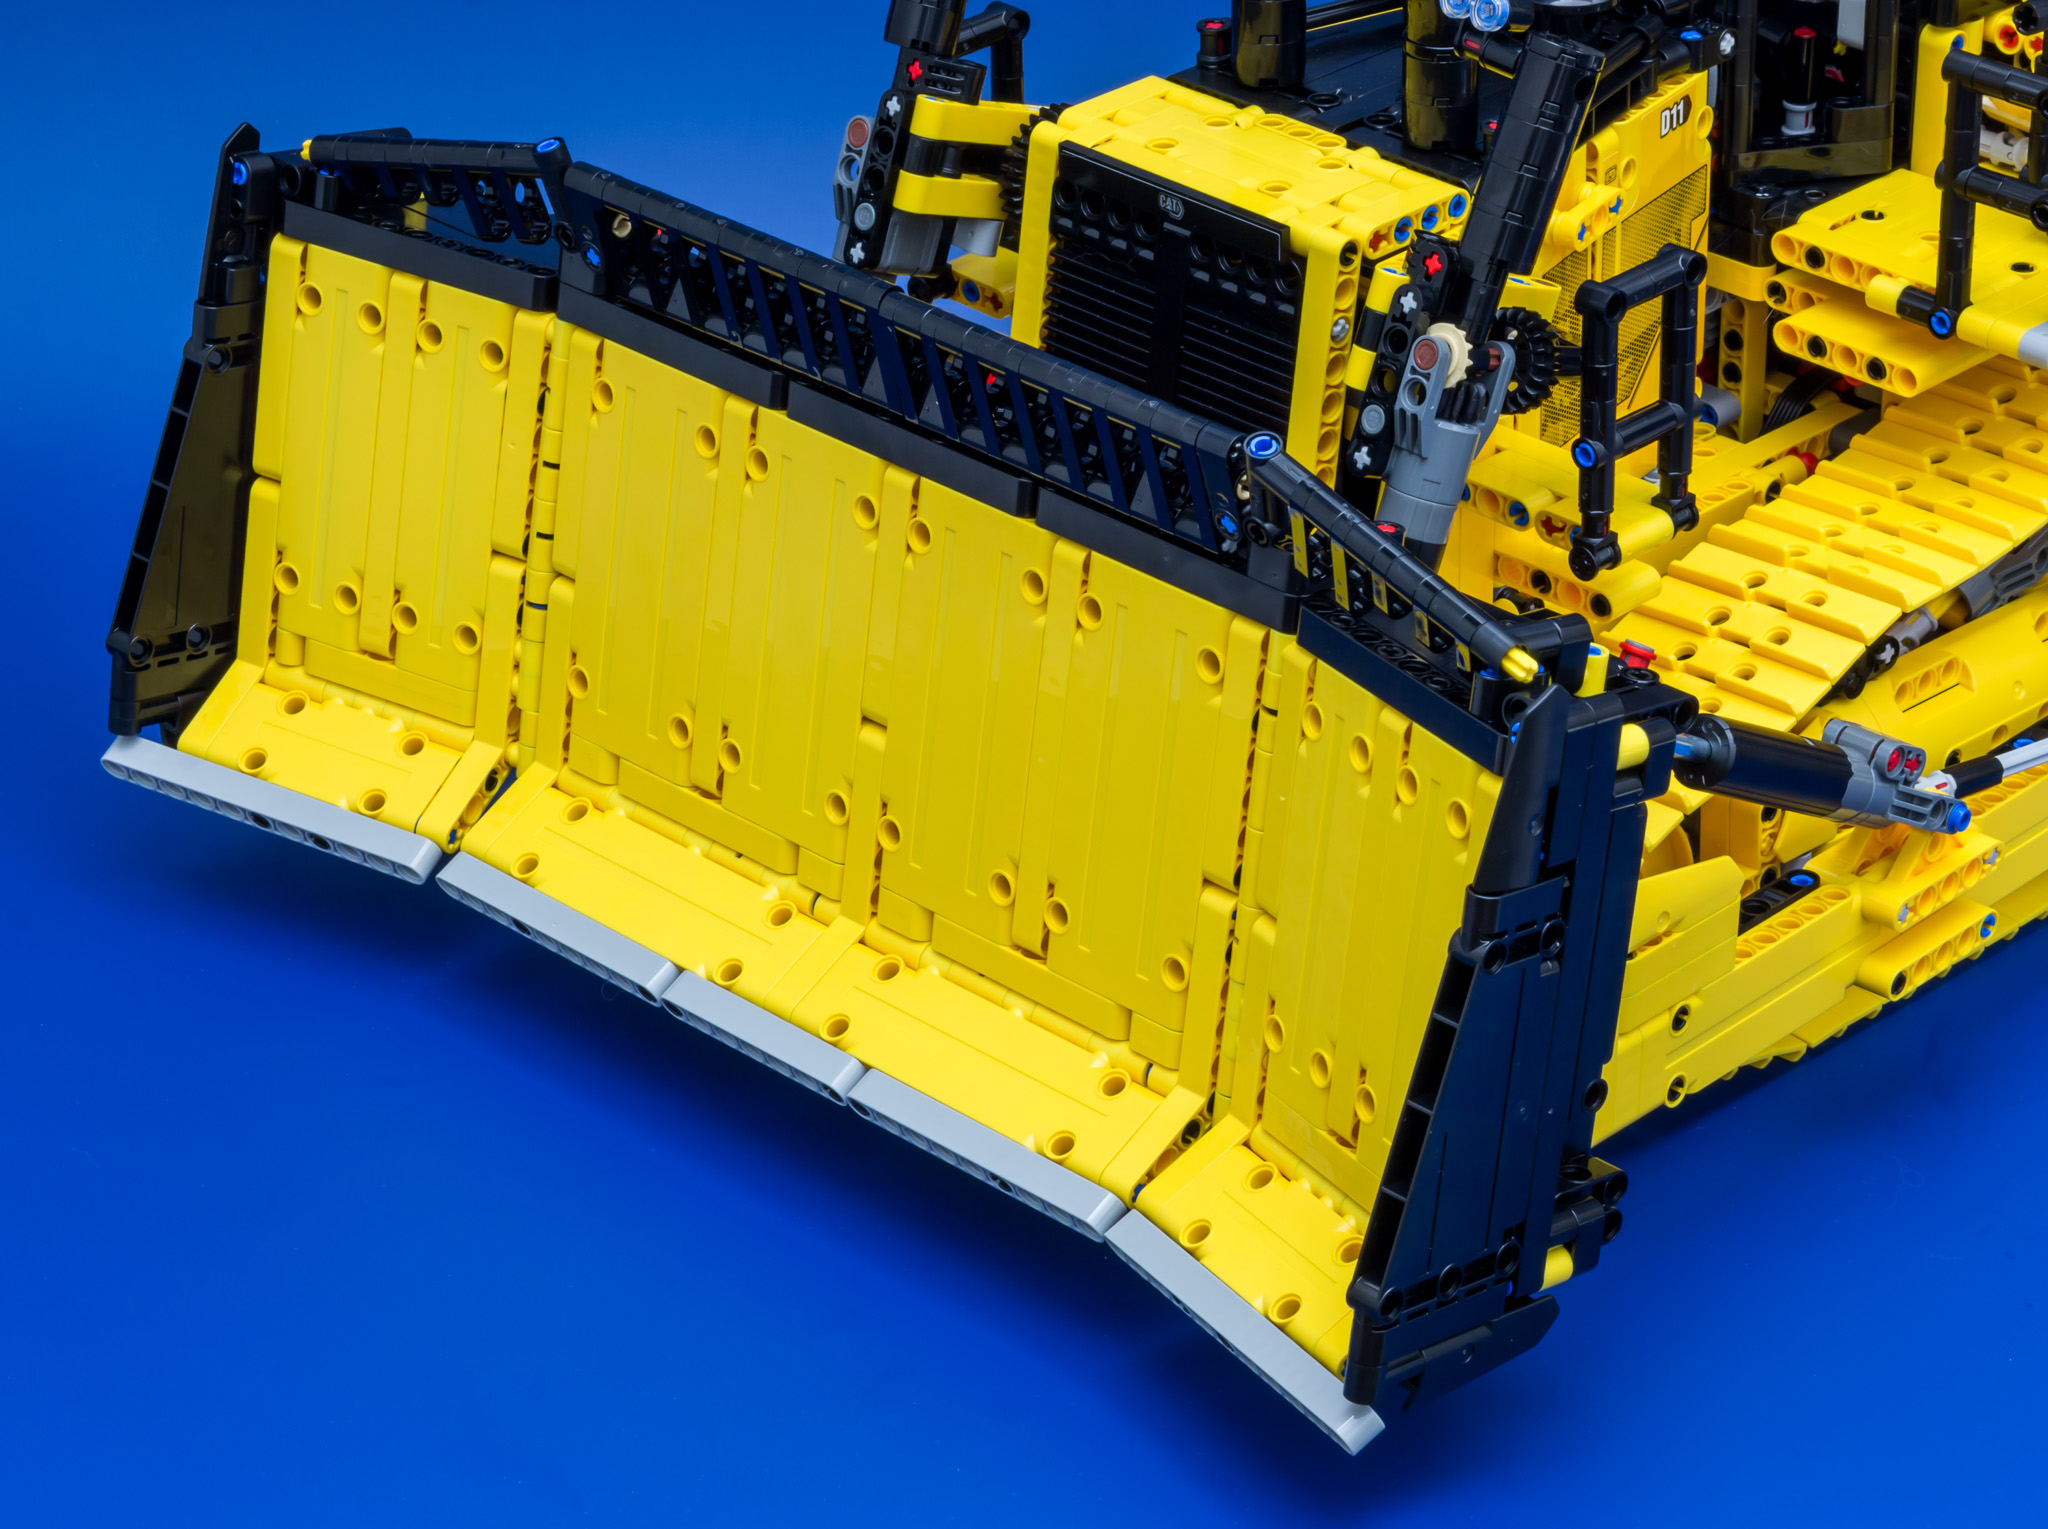
Like the vehicle itself, the blade is MASSIVE!

The blade contains enough parts to keep you busy for an hour or so. Some people are complaining that this set uses too much parts, but for me there is no such thing. I love big builds and this is no exception.

The model is complete when you attach the blade to the vehicle. There are three attachment points per side.
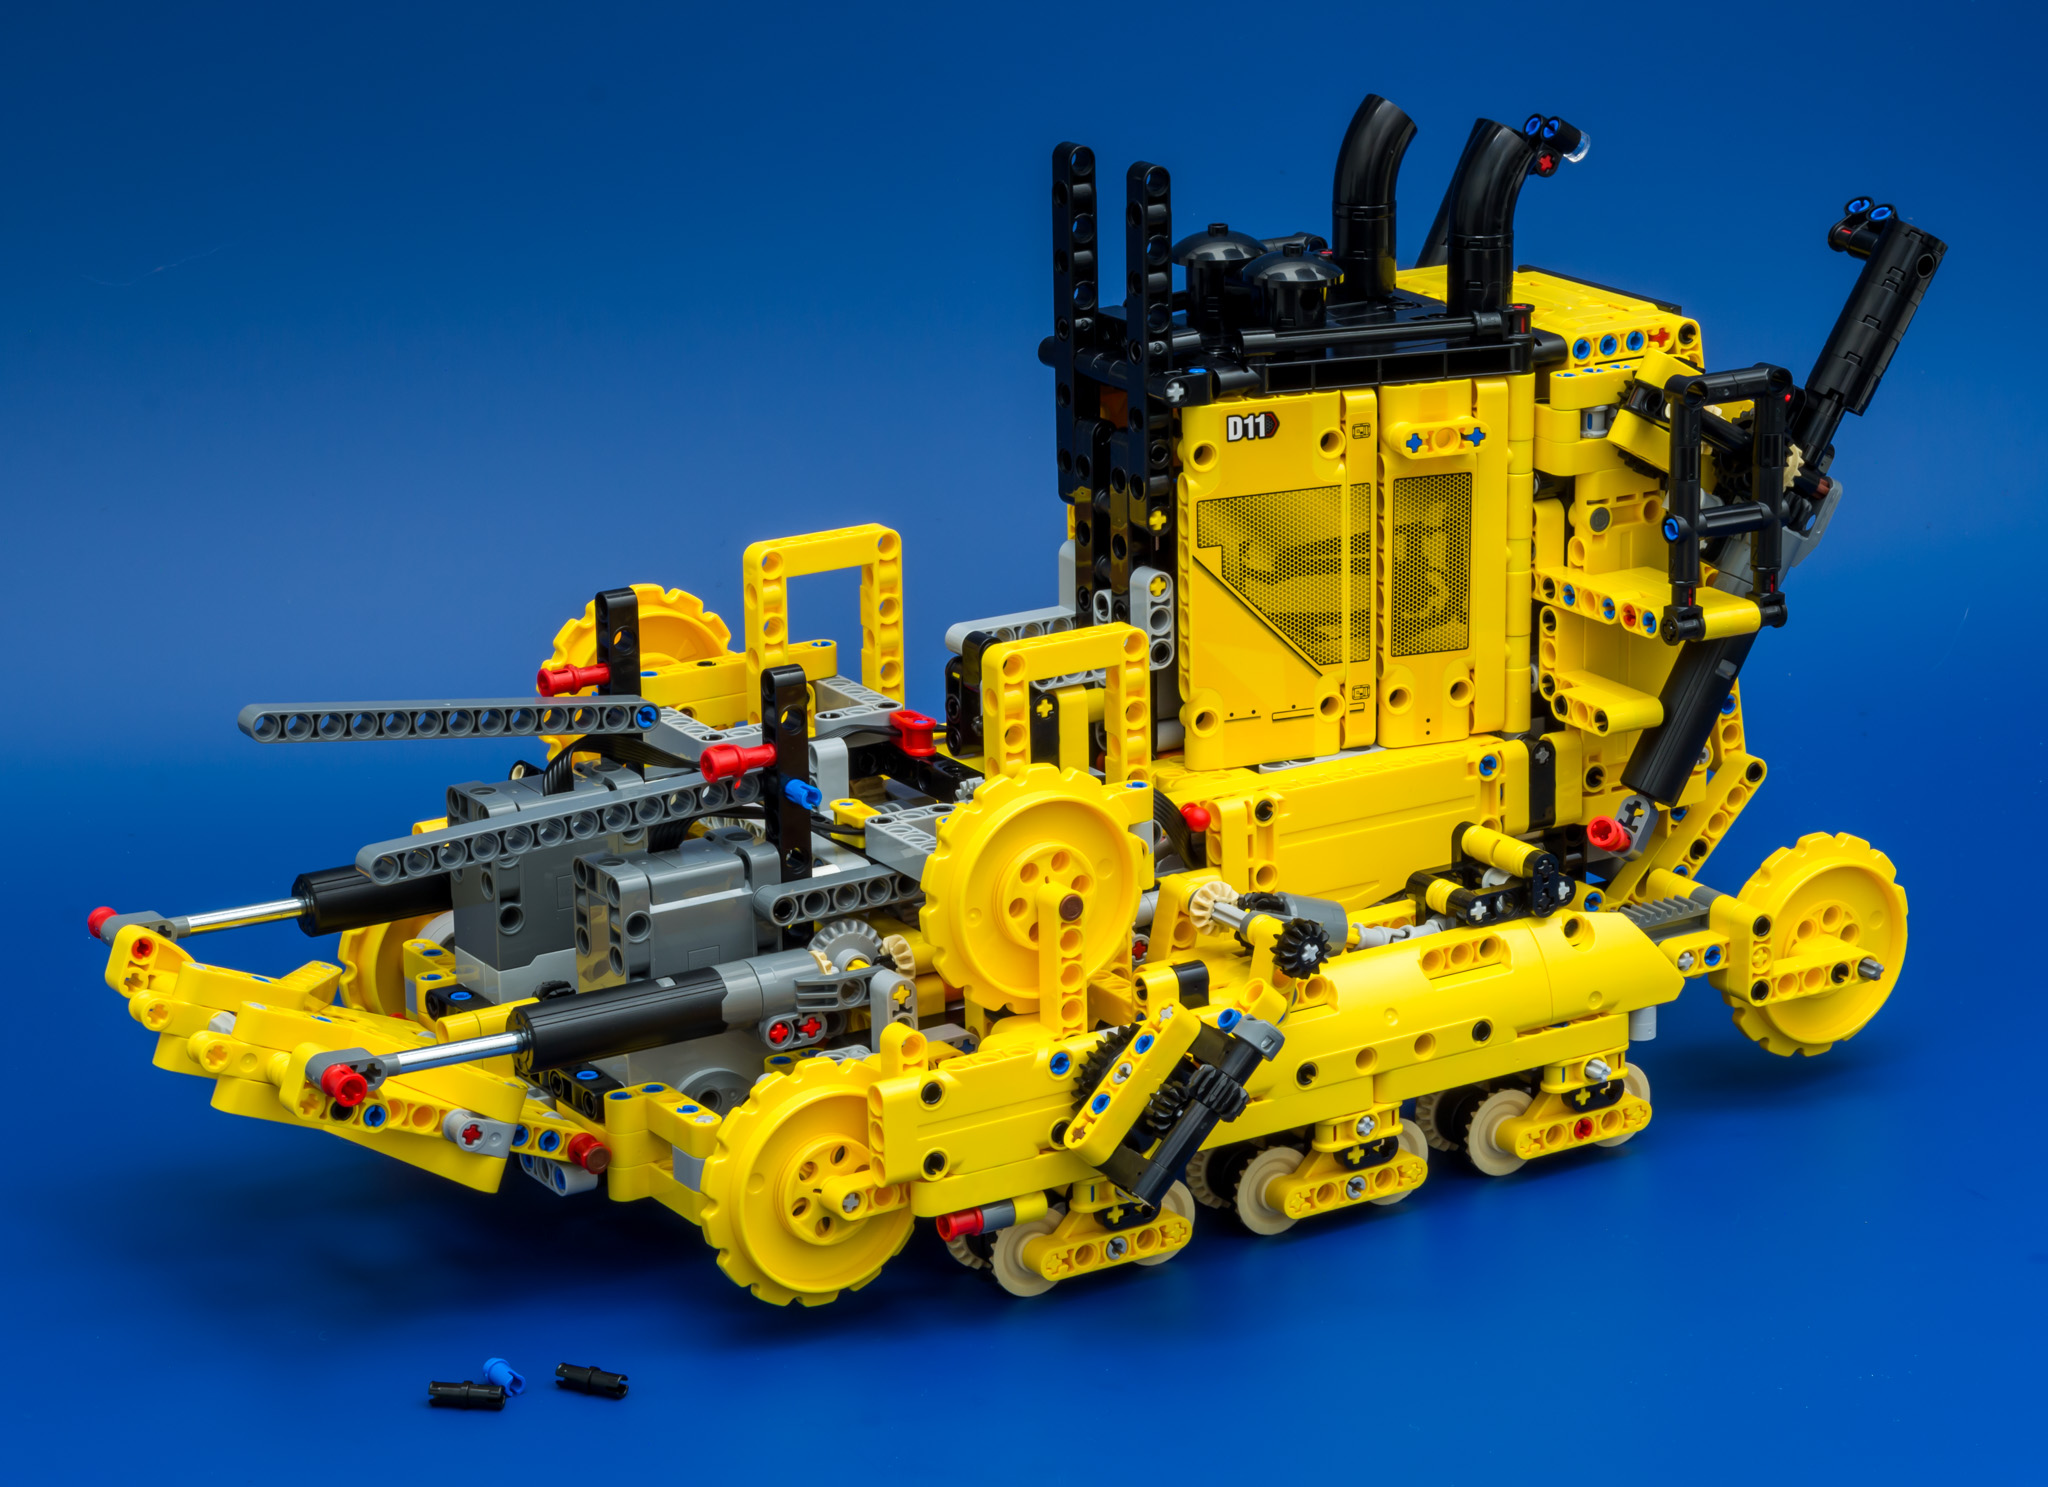
COMPLETED MODEL
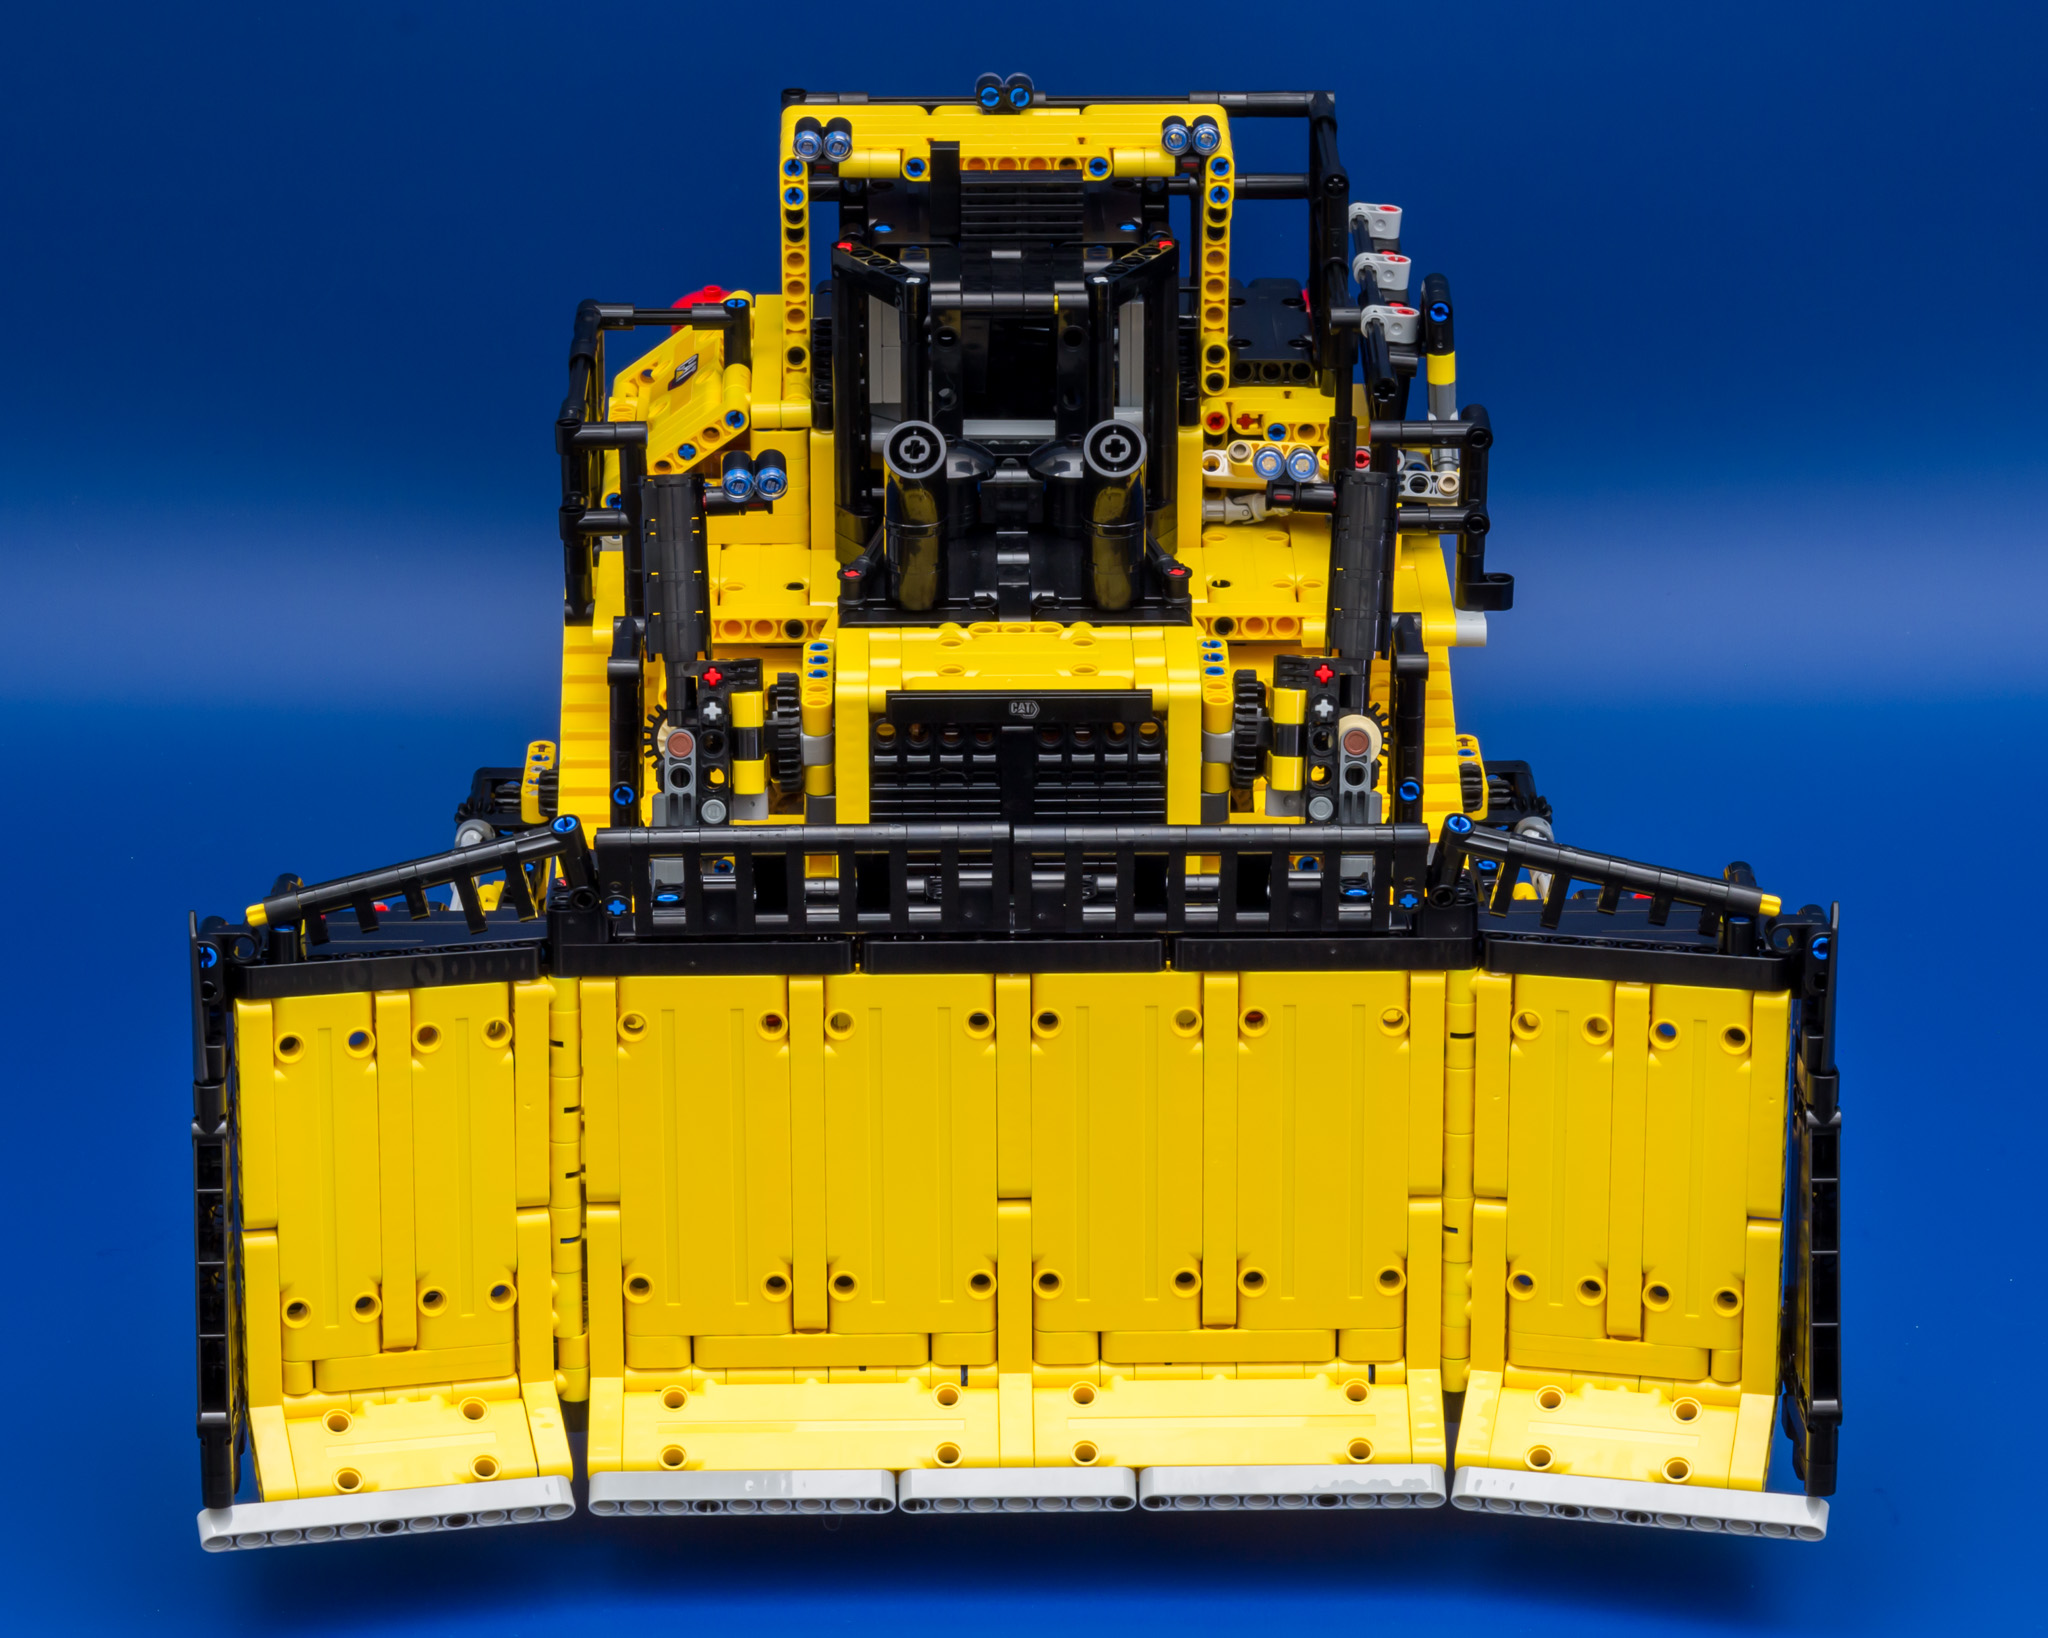
The final model measures 57cm by 26cm, which is not too shabby. Looking at this picture I cannot fathom people claiming this set to be ugly. I absolutely love everything about this model. The prelim pictures showed a lot of yellow and I was afraid it would be too yellow. But TLG changed some parts of the vehicle from yellow to black. This is something which can be done on the real D11 as well. If you ever want to buy a real one, you can decide for yourself.

The ladder is operated via the app, which I will demonstrate when I have the app.
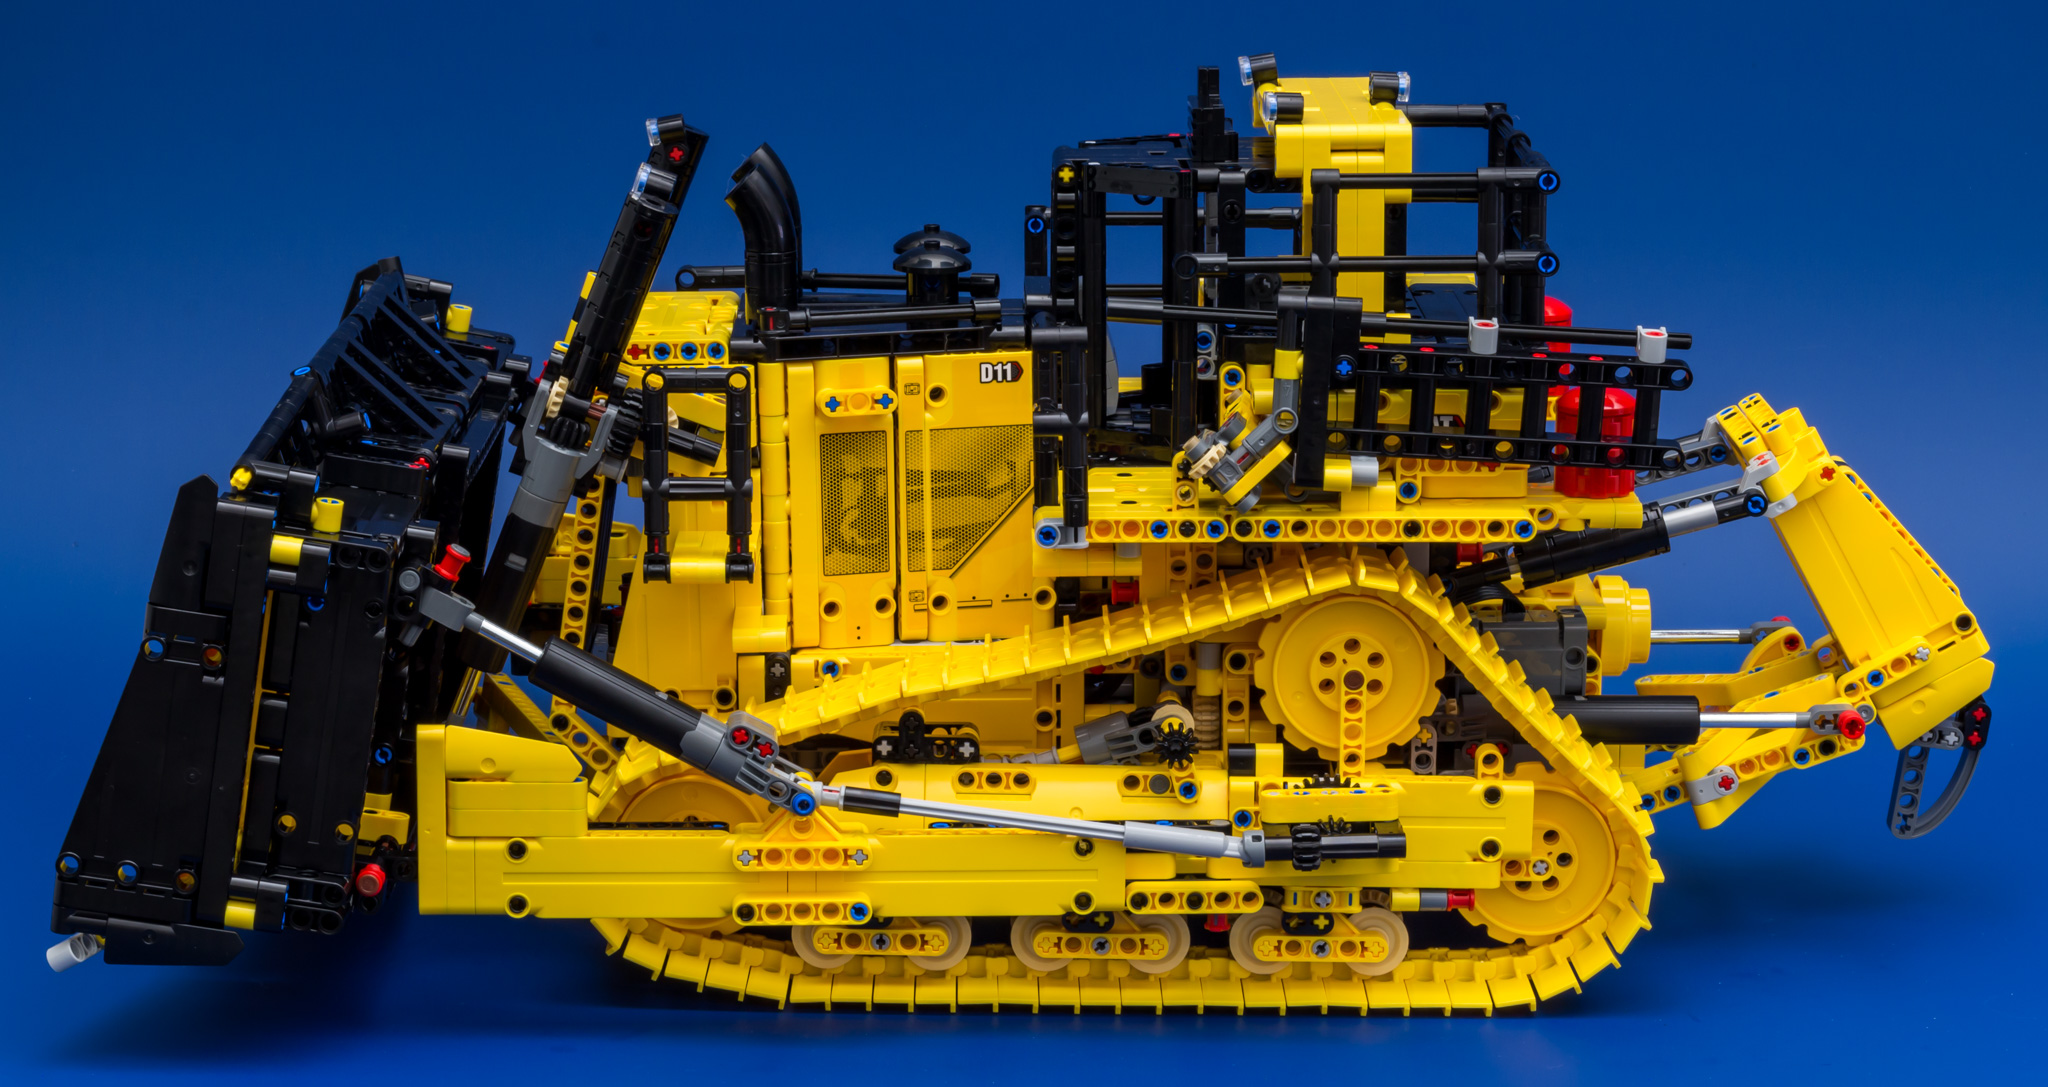
The fake LA's pose a great solution and they do look great.


FEATURES AND FUNCTIONS
I promised to complete this chapter when the app was available. Well, the moment has come.
Just installed the app on my oldskool iPhone 8. Obviously I had to download the app, which took around 20-30 seconds (didn't measure, but it didn't take long). After connecting I had to update the firmware, which actually took a bit longer. All in all in took around a minute and a half to get the app up-and-running.
The picture below shows the main control interface for the CAT. The R and D button switches between Drive and Reverse. When you have engaged D or R you can control the speed of each tread with the yellow levers at the bottom left corner.
The controls for the blade are located at the right, above R and D. You switch between lifting/lowering and tilting the blade. These functions are two of the four functions which are driven by a single motor. The other motor is used to switch between the four functions.
The two other functions are raising/lowering the ripper and raising/lowering the ladder.

After the tour of the app I played around with it and I am actually pleased with playability. Movement is FAST, which is important for me. I had to be careful not to drive it off the table. Controls are not intuitive, but I reckon it's the same in the actual CAT, so I like that the app is like the real vehicle. And there's a second mode for easy driving, which is depicted below. You can control movement with a single "joystick". This works quite well and intuitive. The ladder and ripper functions have moved to the right bottom corner.

Switching functions does take a bit of time, but I definitely don't find this annoying. When you switch function, there seems to be some sort of mini calibration before the function is selected. This results in 2 to 3 seconds before the functions actually start working. And yes, the blade does operate very slowly. It takes quite some time for the blade to be lowered or raised. Being operated via LA's, I do find this understandable and acceptable. I am pleased that driving this behemoth is smooth and quite fast. A cool detail is the fact one can see the pistons moving when you open the doors to the engine compartment.
I guess I am the odd one out, but I am very happy with the experience. Maybe it is because of reading a lot of negative comments, but I am pleasantly surprised with the app, as I am with the entire model.
If you like to see the model in action, I recommend watching this awesome video by our one and only Racing Brick. You can also join the discussion in his video review topic.
SUMMARY
I cannot express how much I loved to build this model. I can't recall ever having so much fun building an entire set. Usually my attention dwindles towards the end of the build, but I had fun all the way to the end. I was excited during the build and I loved to see how the functions (mostly LA's) were connected to the gearbox.
When it comes to the design of the set, I am in love as well. This is a proper construction vehicle, looking as impressive as an actual CAT.
The gearbox isn't overly complicated, but I don't mind. Having an huge gearbox can be a risk, as we have seen in some previous sets. This simple gearbox has a better chance of working properly. I can't say anything about the playability yet. I will update my review when I have tested the app.
Obviously I do need to address the elephant in the room. And by elephant, I don't mean the CAT itself, but its huge price tag. Actually, the price isn't that ridiculous compared to other Technic sets. Containing almost 4000 parts and five Powered Up elements, the price is what one can expect. Which doesn't mean I'm saying this set comes cheap. 450 euro (RRP) for a building toy is a LOT of money, I totally understand that. But I do think this set is worth the money if you can pick it up for 350 odd euro. I will definitely be picking up another copy to build alternate models and leave this one built, so I can enjoy looking at it.
Reading lots of comments, I wonder if am looking for different things in a Technic set. Too big, too ugly, don't like this, don't like that. Everybody is entitled to their opinion, but I do get the impression that TLG designers cannot do it right. No gearbox, only motors. Gearbox too big, or in this case gearbox too simple. There's always something to complain about. I can honestly say that in my opinion TLG has launched an awe-inspiring Technic model.
At this point I do think this is my new #1 set, but obviously I have to wait till I have tested the app. To be continued...
CONCLUSION AFTER TESTING THE APP
I have tested the app and I was actually very happy with the experience. Reading a lot of negative (or rather, less positive) comments, I wasn't expecting much. But the installation process went smoothly, as was the firmware update, calibration and tour of the app. The secondary functions indeed operate slowly, but for me that is compensated by the smooth and fast driving of the vehicle itself.
Bigger isn't always better, but the sheer size of the vehicle is impressive and its ability to move rather fast is even more impressive. All things considered, I love everything about this set and I do think it's a masterpiece. I hope that we will get more models like this one in the future! And yes, I will still get myself another copy :wink:
PROS
- Impressive design
- Impressive size
- Fast movement
- Four functions besides movement
- Four functions operated by two motors (gearbox)
- Ladder function is a nice addition
- V12 engine with visibly moving pistons
CONS
- Secondary functions operate slowly
- Price can be an issue
SCORE
How do I rate this set?
10 DESIGN

Impressive design. I love to look at this vehicle.
11 BUILDING EXPERIENCE

My best build ever.
9 FEATURES

The ladder is the cherry on the pie.
9 PLAYABILITY
Pleasantly surprised by the playability.
8 PARTS

A great selection of parts to build tracked construction vehicles.
8 VALUE FOR MONEY
This one is highly subjective and will probably depend on your budget.
9,2 MASTERPIECE
Thanks you for reading this review. All pictures can be found here.